
If you’re planning a roofing project, one question that you might have is how many nails you’ll need to secure the shingles. The answer is not as simple as a one-size-fits-all solution since it depends on several factors such as the size of the shingles, the slope of the roof, and the wind zone you’re in.
However, knowing how many roofing nails per square is crucial to ensure the integrity and longevity of your roof. In this article, we’ll explore the factors that determine the number of nails per square, and provide some general guidelines for different roofing materials.
Whether you’re a DIY enthusiast or a contractor preparing for a roofing project, our guide has got you covered. So, let’s get started and learn how many roofing nails per square you’ll need for your next project!


Understanding Roofing Nails and Shingles
When it comes to roofing, choosing the right type of nail is crucial. The type of nail you choose will depend on the type of shingle you are using, as well as the material of the nail itself.
In this section, we will discuss the different types of roofing nails and their materials.
Types of Roofing Nails
There are two main types of roofing nails: smooth shank and ring shank. Smooth shank nails are the most common type of roofing nail and are used for asphalt shingles.
Ring shank nails have ridges along the shank, providing extra grip and making them ideal for high-wind areas.
Nail Materials
Roofing nails can be made from a variety of materials, each with its own benefits and drawbacks. The most common materials for roofing nails are galvanized steel, stainless steel, copper, and aluminum.
- Galvanized steel nails are coated in zinc, making them resistant to rust and corrosion. They are a popular choice for asphalt shingles.
- Stainless steel nails are even more resistant to rust and corrosion than galvanized steel nails. They are a good choice for coastal areas with high salt content in the air.
- Copper nails are highly resistant to corrosion and can last for decades. They are often used for slate and tile roofs.
- Aluminum nails are lightweight and do not rust, making them a good choice for metal roofs.
Other Types of Roofing Nails
In addition to smooth and ring shank nails, there are other types of roofing nails that may be used in certain situations. Coil roofing nails are used in nail guns and can be a time-saver for larger projects.
Galvanized nails are coated in zinc, making them resistant to rust and corrosion. Ring shank nails have ridges along the shank, providing extra grip and making them ideal for high-wind areas.
Steel nails are strong and durable, but can rust over time. Copper nails are highly resistant to corrosion and can last for decades.
Aluminum nails are lightweight and do not rust, making them a good choice for metal roofs. Button cap roof nails and cap nails have a cap on the head of the nail, providing extra protection against leaks.
Choosing the Right Nail for Your Shingles
When choosing a roofing nail, it’s important to consider the type of shingle you are using. For example, asphalt shingles typically require four nails per shingle, while architectural shingles require six.
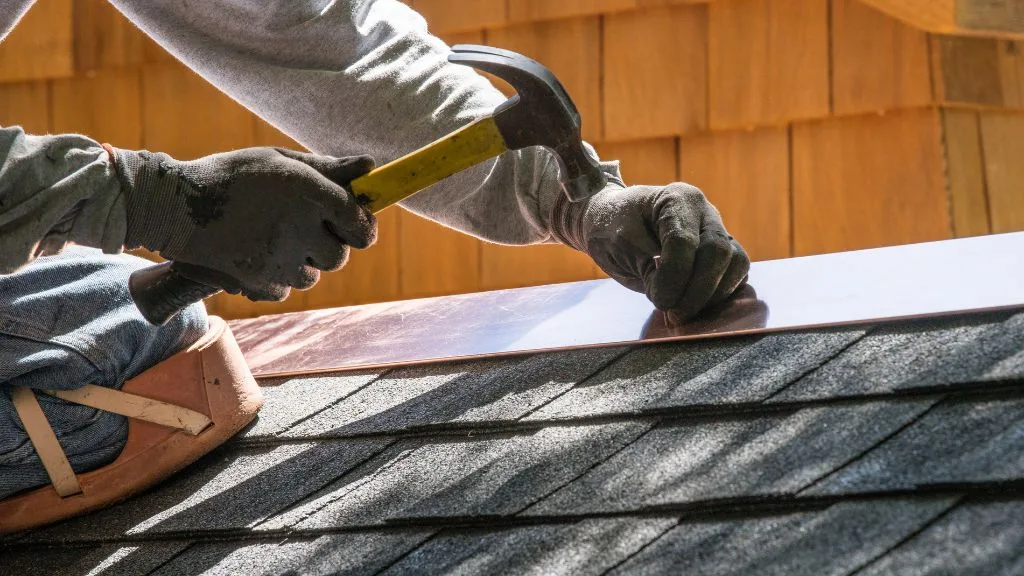
It’s also important to choose a nail that is the right length for your shingle. A roofing hammer is the best tool for driving nails into your shingles.
Finally, it’s important to make sure that your nails are not exposed, as this can lead to leaks and other problems down the line.

Calculating the Number of Nails Per Square
If you’re planning on installing a new roof or replacing an old one, you’ll need to know how many roofing nails you’ll need. The number of nails required per square foot depends on various factors, including the type of shingles, the size of the roof, the gauge of the nails, and the wind conditions in your area.
Estimating the Number of Nails
To calculate the number of nails you’ll need, you’ll first need to determine the total area of your roof in square feet. You can do this by measuring the length and width of each section of your roof and multiplying them together.
Once you have the total roof area, you can divide it by 100 to get the number of squares.
Once you know the number of squares, you can estimate the number of nails you’ll need. For example, if you’re using architectural shingles, you’ll need 10 nails per square foot.
This means you’ll need 320 nails per square (or 3,200 nails per 10 squares).
Factors Affecting the Number of Nails
The number of nails you’ll need can vary depending on various factors. Here are a few things to consider:
- Wind conditions: If you live in an area with high winds, you may need to use more nails per shingle to keep them in place. Some areas may even require special roofing nails that are designed to withstand high winds.
- Shingle type: Different types of shingles may require different numbers of nails. For example, some shingles may require four nails per shingle, while others may require five.
- Nail length and gauge: The length and gauge of the nails you use can also affect the number of nails you’ll need. Thicker nails may require fewer per shingle, while thinner nails may require more.
- Roofing materials: The type of roofing material you use can also affect the number of nails you’ll need. For example, some materials may require more nails to hold them in place than others.
- Roofing felt: If you’re using roofing felt, you’ll also need to factor in the number of rolls you’ll need. Typically, you’ll need one roll of felt for every 400 square feet of roof area.
Overall, calculating the number of nails you’ll need for your roof can be a bit of a challenge. However, by considering the factors listed above and using the appropriate formula, you can make sure you have all the nails you need to complete your roofing project.
Installation and Building Codes
Proper Installation Techniques
When it comes to roofing installation, proper technique is crucial. To ensure that your roofing system is installed correctly, it is important to follow the manufacturer’s instructions and guidelines.
Additionally, it is recommended to hire a professional roofing contractor who has experience with the type of roofing material you are using.
One important factor to consider when installing roofing is the pitch of the roof. The pitch will determine the type of roofing material that is appropriate for your roof, and it will also affect the number of nails needed per square.
For example, a roof with a steeper pitch will require more nails per square than a roof with a lower pitch.
Another important aspect of proper installation is the use of drip edge and flashing. These components help to prevent water from seeping into the roof and causing damage.
Cedar roofing also requires special attention to ensure proper installation and avoid leaking.
Building Codes and Regulations
Building codes and regulations vary by location, but it is important to follow them to ensure that your roofing system is up to code and safe.
For example, the International Building Code (IBC) and the International Residential Code (IRC) provide guidelines for roofing installation and specify the type and length of nails that should be used.
According to the IBC, fasteners for asphalt shingles should be galvanized, stainless steel, aluminum, or copper roofing nails with a minimum 12-gauge shank and a minimum 3/8-inch diameter head.
The nails should be long enough to penetrate through the roofing materials and not less than 3/4 inch into the roof sheathing.
For high wind areas, additional measures may be required to ensure that the roofing system is secure. Some building codes require the use of cap nails or other types of roofing nails to provide extra security.
It is important to note that different shingle manufacturers may have their own specific installation guidelines, so be sure to check with the manufacturer before beginning installation.
By following proper installation techniques and building codes and regulations, you can ensure that your roofing system is installed correctly and will provide long-lasting protection for your home or building.


Additional Considerations
When estimating the number of roofing nails needed for your project, there are a few additional considerations to keep in mind. These considerations include waste and overhang, underlayment options, trim allowance, and inspections.
Waste and Overhang
It’s important to factor in waste when estimating the number of roofing nails needed for your project. The amount of waste will vary depending on the complexity of your roof, but a good rule of thumb is to add 10% to your total square footage to account for waste.
You should also consider the overhang of your roof. The overhang is the part of the roof that extends beyond the exterior walls of your home.
You will need to use additional roofing nails to secure the shingles on the overhang.
Underlayment Options
Underlayment is a layer of material that is installed between the roof deck and the shingles. It provides an additional layer of protection against moisture and helps to keep your home dry.
There are several different types of underlayment options available, including felt paper and synthetic underlayment. Synthetic underlayment is more expensive than felt paper, but it is also more durable and provides better protection against moisture.
Trim Allowance
Trim allowance is the amount of space that is left between the edge of the shingles and the fascia board. This space is necessary to allow for expansion and contraction of the shingles due to changes in temperature.
You should consult with your roofing contractor to determine the appropriate trim allowance for your project. The trim allowance will vary depending on the type of shingles you are using and the climate in your area.
Inspections
It’s important to have your roof inspected regularly to ensure that it is in good condition and to identify any potential problems before they become major issues. You should have your roof inspected at least once a year, and more frequently if you live in an area with severe weather conditions.
During a roof inspection, the inspector will check for signs of damage, such as missing or broken shingles, and will also inspect the flashing and ventilation systems.
In conclusion, estimating the number of roofing nails needed for your project requires careful consideration of several factors, including waste and overhang, underlayment options, trim allowance, and inspections.
By taking these factors into account, you can ensure that your roofing project is a success and that your home is protected from the elements.