

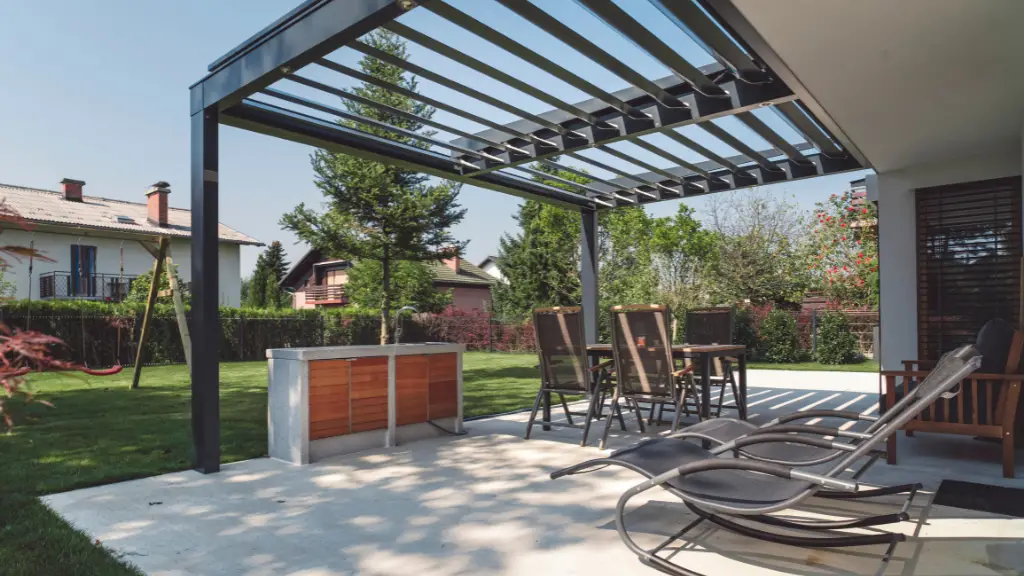
A pergola is a structure that can be attached to the top of your house or building. Pergolas are commonly used as an outdoor living space but they would also look great indoors!
A pergola has two main parts: the beams and the columns. The most popular type of beam is wood but metal, stone, glass and even PVC can be used for beams.
Columns come in all shapes and sizes so it’s important to choose one that fits into your design plan for your new pergola.
Related Post: How To Choose The Best Roofing For Pergola
Attaching a pergola to your roof is easy and can be done in just a few hours.
This article will guide you through the process of attaching a pergola to your roof and provide some helpful tips that you should consider before starting the project. Read on for more information!
Steps in attaching a pergola to a roof
Follow the steps below to attach a pergola to your roof:
First Step: Choose a good location for your pergola and mark the area where you want to attach it.
You should make sure that there is enough room around the pergola site so that you can work safely without hitting anything or anyone.
Second Step: Start by laying out your beams on top of each other in an X shape, with the middle of each beam touching.
Third Step: Get them level by using a straight board to check the beams for any uneven spots, then use extra wood or shims to get rid of them.
Fourth Step: Use screws that are at least an inch long and drill through both sides of your beams so they won’t pull apart while you’re attaching it to the roof.
Fifth Step: Attach a temporary brace to each beam on either side of your work area (where it will be attached to the house) and make sure that they are secure against an existing wall or structure in order to keep things sturdy while you’re working on them.
Sixth Step: Now, attach two columns pergola at one end of the beams and make sure that they are secure on all sides before moving onto attaching a column at the other end.
Seventh Step: Secure your columns by using one-inch screws just like you did with your beams, making sure to drill through both ends of each beam so it won’t pull apart from its place.
Eighth Step: Your pergola should now be standing on its own! You can rest it against a wall or brace just to ensure that nothing happens while you’re working.
Ninth Step: Use support boards to connect the beams and columns together, then add screws through each board into both your existing structure and your pergola beams for extra security.
Make sure everything is secure before moving onto the next step.
Tenth Step: Use screws that are at least an inch long to attach your pergola beams by drilling through both sides of each beam, making sure it is secure on all four corners and in between each one.
There should be a screw in every little space where the boards cross over one another so nothing moves while you’re working.
Eleventh Step: Use decking screws to attach the boards that will act as your roof, then drill through both sides of each board so it won’t pull apart while you’re attaching it to the beams and columns on top of them.
Make sure everything is secure before moving on to adding a finish coat!
Twelfth Step: Add finishing touches like paint or stain to your pergola and enjoy a brilliant new outdoor living space.
By following these easy steps, you can have your new outdoor living space set up in just a few hours!


What are some helpful tips that you should consider before attempting this project?
- Make sure your pergola is sturdy and won’t fall off of your house when being used.
- If using a beam made from wood, paint or treat your beam to protect it from the elements.
- Make sure that your pergola is level and doesn’t lean to one side more than the other.
- Use a power drill with long screws for this project as it will make everything go much faster if you do not have to manually screw each beam into place.
Only attempt this project if you have a lot of time or are working with someone else as it will take some time to put together.
What tools will you need to attach a pergola to a roof?
- A drill with long screws.
- A power saw if using wood beams instead of metal ones (to measure and cut the boards).
- Decking screws for the roof that are at least an inch in length.
- Extra shims to make the pergola more sturdy if needed.
- Safety goggles and gloves in case something happens while you’re working on your project.
How much will it cost to attach a pergola to a roof?
Pergolas cost between $2,200 and $5,900 on average. The cost will be determined by the pergola’s size, material, and style.
Samples:
- A wooden pergola measuring 10’x10′ would cost roughly $2,500.
- A 10’x10′ metal pergola would cost roughly $3,500.
- A 10’x10′ fabric-covered pergola would cost roughly $4,500.
- A polycarbonate roof on a 10’x10′ pergola would cost roughly $5,500.
A pergola is a terrific method to increase the exterior appeal of your home while also creating an outside living space. Before making a selection, think about the various benefits and drawbacks of pergola roofs.

Final Thoughts
One of the easiest ways to get a beautiful outdoor space is by adding an attractive pergola.
A pergola can be attached in many different ways, but it’s best not to attach one using only nails because if you do this it will eventually come off and need replaced.
If you are looking for a way to make your outdoor living area more enjoyable without spending much time or money then consider attaching a pergola that will last longer than just having some leaning posts holding up the roof.