

The window sill is an essential component of any window installation, providing structural support and protecting your home from moisture damage. Over time, window sills can become worn, damaged, or decayed, requiring replacement to ensure your windows and home remain in top condition.
If you’re a homeowner looking to replace your window sills, you might be wondering about the process and cost involved. In this article, we’ll provide you with expert insights into window sill replacement, including when to replace them, the materials and tools you’ll need, and the steps involved in the process.
Whether you’re a DIY enthusiast or looking to hire a professional, this guide will equip you with the knowledge to make informed decisions and get your window sills looking and functioning like new. So, let’s get started and discover everything you need to know about window sill replacement!

Signs of Window Sill Damage
Rot and Mold
A rotten windowsill is often caused by prolonged exposure to moisture, which can impact the strength and appearance of your windowsill. To identify rot, look for discolored, softened, or crumbled wood.
Mold is another common consequence of moisture in your windowsill area. A moldy windowsill will have black, green, or white spots or a musty smell.
Be sure to address any rot and mold quickly to preserve the integrity of your window and prevent further damage.
Weather-Damaged Caulk
Damaged caulk is another sign that your windowsill may need attention. Over time, weather can cause the caulk to crack or peel, leading to gaps and potential water intrusion.
Examine the caulk around your windowsill for these signs:
- Cracked or peeling caulk
- Gaps between the caulk and the window or surrounding trim
- Discolored or moldy caulk
If you notice any of these issues, consider replacing the damaged caulk as soon as possible to ensure your windowsill remains protected from water and air infiltration.

Window Sill Replacement Process
Removing the Old Window Sill
To remove the old window sill, start by carefully using a utility knife to cut through any caulking around the edges. Next, take a pry bar and gently pry the window sill away from the wall to loosen it.
Be cautious to avoid damaging surrounding materials.
Once loosened, you may need to remove any nails that are keeping the sill in place. Use a hammer and putty knife to create enough space to pull out nails safely.
Measuring and Cutting the New Sill
- Measure the length, width, and depth of the old sill to determine the size of the new sill.
- Select an appropriate board for your replacement sill (a white, acrylic bullnose is a popular choice).
- Transfer your measurements onto the new board with a pencil.
- Cut the new sill to size with a circular saw or hand saw, following the marked lines.
- Double-check the fit by holding the new sill in place.
Finishing the Sill
- Grab some sandpaper and smooth out any rough edges or surfaces.
- If needed, use a router to create a matching profile on the new sill.
- Check the new sill for any imperfections and fill them with wood filler, then sand it smooth once it dries.
Installing the New Sill
- Before installing the new sill, make sure the surface underneath is clean and free of debris.
- Position the new sill in its intended spot, ensuring that it is level. Use a level to confirm this.
- Nail the new sill in place with appropriate nails, being cautious not to split the wood.
- Apply caulking around the edges to protect against water damage and create a finished appearance.
By following these steps, you have successfully replaced your window sill. Be sure to maintain a clean and safe environment while performing this task.


Choosing the Right Materials
When it comes to replacing your window sills, selecting the right material is crucial. Different materials offer varying degrees of durability, moisture resistance, aesthetics, and cost.
- Wood Window Sills: Wood is a traditional and popular choice for window sills. They have a classic appearance and often blend well with other wood features in your home. However, wood is less resistant to moisture and may require periodic maintenance, such as sanding or painting, to keep them in good condition.
- PVC Window Sills: PVC (polyvinyl chloride) is an affordable option for window sills. It is resistant to moisture and doesn’t require much maintenance. However, PVC is not the most environmentally friendly material and may not suit all design aesthetics.
- Stone Window Sills: Stone window sills provide a high-end, designer look to your home. They are very durable and moisture resistant but can be quite expensive. Stone options include granite, marble, and travertine.
- Tile Window Sills: Tile window sills are another option that offers a wide range of design possibilities. They can be created using ceramic, porcelain, or natural stone tiles, providing a customizable and moisture-resistant surface.
When selecting the right material for your window sill replacement, weigh the pros and cons of each option. Consider factors such as your home’s design, your budget, and the climate in your area.
Choosing a material that suits your needs will ensure your new window sills last for years to come.
Additionally, when shopping for products, look for high-quality options from reputable manufacturers. M-D Building Products, for example, offers a range of wood and PVC sill nosing products that can be used in window sill replacements.
Keep in mind that investing in quality materials is essential for long-lasting results.


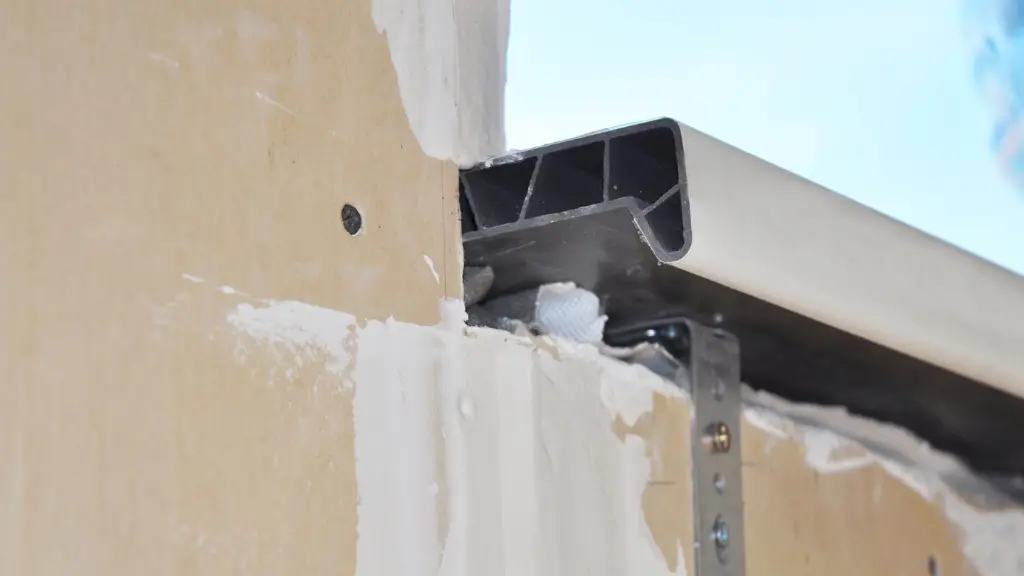
Dealing with Adjacent Components
Siding and Window Trim
When replacing a window sill, it’s important to consider the surrounding components, such as the siding and window trim. Here’s how to handle them:
- Start by carefully removing the window trim. You may use an oscillating multi-tool to cut through the nails holding the trim in place. Gently pry the trim away from the window using a flat pry bar.
- Cut through the house siding directly below the sill with the multi-tool. Be cautious not to damage the siding or underlying waterproofing materials.
- After replacing the sill, reattach the siding below the sill. Use appropriate fasteners for the siding material, preserving the integrity of the waterproofing layer.
Drywall
If the window sill replacement requires you to deal with the interior drywall surrounding the window, follow these steps:
- Use a utility knife to score the edges of the drywall where it meets the window frame. This helps to minimize any tearing or damage to the drywall’s paper surface.
- Carefully remove any interior window trim, such as casing or jamb extensions. Dispose of any drywall fasteners you encounter during the process.
- Inspect the surrounding drywall for damage. If necessary, patch the drywall using joint compound and sand it for a smooth finish. You may need to repaint or touch up the area after patching.
- After replacing the window sill, reinstall the interior window trim, and caulk the gaps or seams for a polished look.
By following these steps, you can ensure that the adjacent components, such as siding, window trim, and drywall, are properly handled during the window sill replacement process. This will result in a seamless and professional-looking finish.


Additional Considerations
Decorative Window Sills
When replacing your window sills, consider the decorative aspects as well. Different materials and designs can give your windows a unique appearance, enhancing the overall look of your home.
Some popular choices for decorative window sills include stained or varnished wood, marble, granite, and even tile. Take the time to explore your options and choose a design that complements your home’s aesthetic.
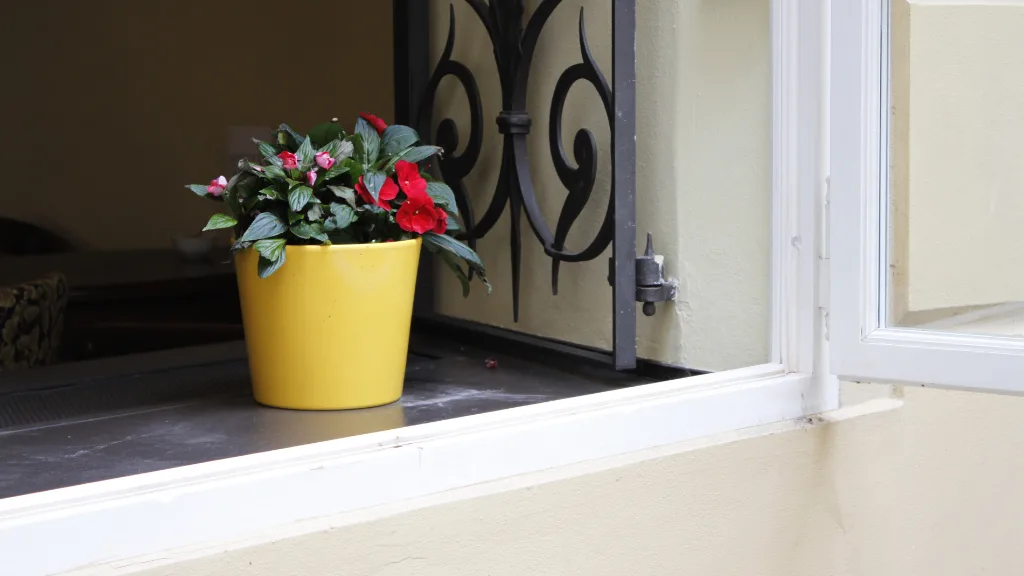
Plants and Window Sills
Window sills are often used to display plants, which can add a touch of life and color to your home. If you plan on using your window sills for this purpose, opt for materials and designs that are durable and capable of supporting the weight and moisture typical of an indoor plant display.
Make sure the window sills have proper drainage and will not be damaged by water or sunlight.
When replacing your window sills:
- Check for any signs of damage, such as rot, warping, or cracks
- Use a pry bar or chisel to remove the old window sill
- Measure and cut the new window sill to the appropriate size
- Install the new window sill using appropriate hardware and sealant
Keep in mind these best practices for maintaining your window sills:
- Regularly inspect your window sills for signs of wear and tear
- Address any damage promptly to avoid more extensive repairs in the future
- Properly maintain your plants and plant containers to prevent water or soil damage to your window sills