

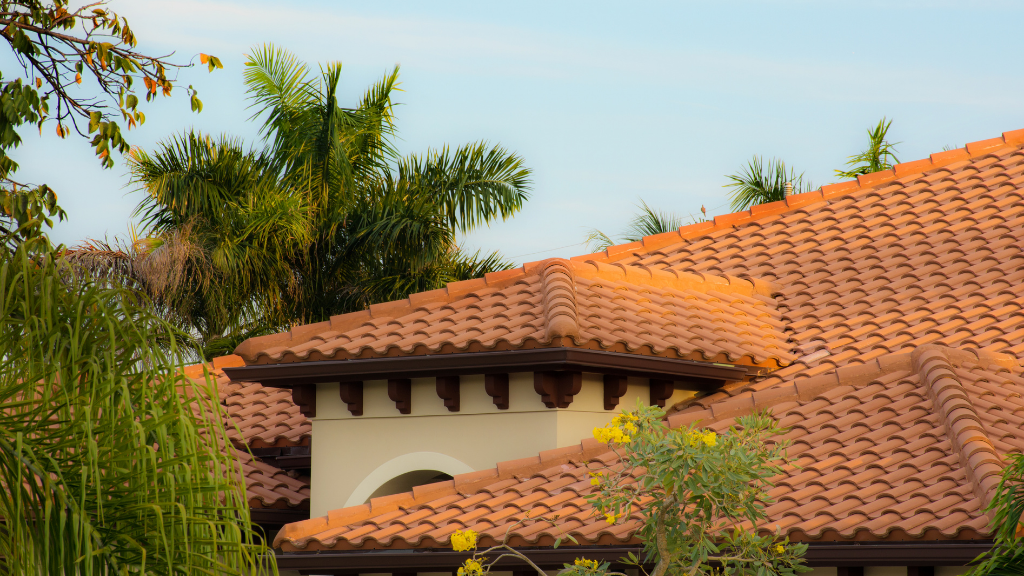
A clay tile roof can add beauty and value to any home, but like any roofing material, it may require repairs over time.
Whether due to weather damage, wear and tear, or other factors, it’s important to know how to properly repair clay tile roofs to ensure their longevity and structural integrity.
In this article, we’ll provide you with a comprehensive guide to clay tile roof repair, including step-by-step instructions, necessary tools, and common issues to look out for.
With this knowledge, you’ll be able to tackle any repairs with confidence and maintain the beauty and functionality of your clay tile roof for years to come.
Signs of Clay Tile Roof Damage
Clay tile roofs are known for their longevity and durability. However, like any roofing material, they can experience wear and tear over time.
Here are some common signs of damage to look out for in order to keep your clay tile roof in the best condition possible.
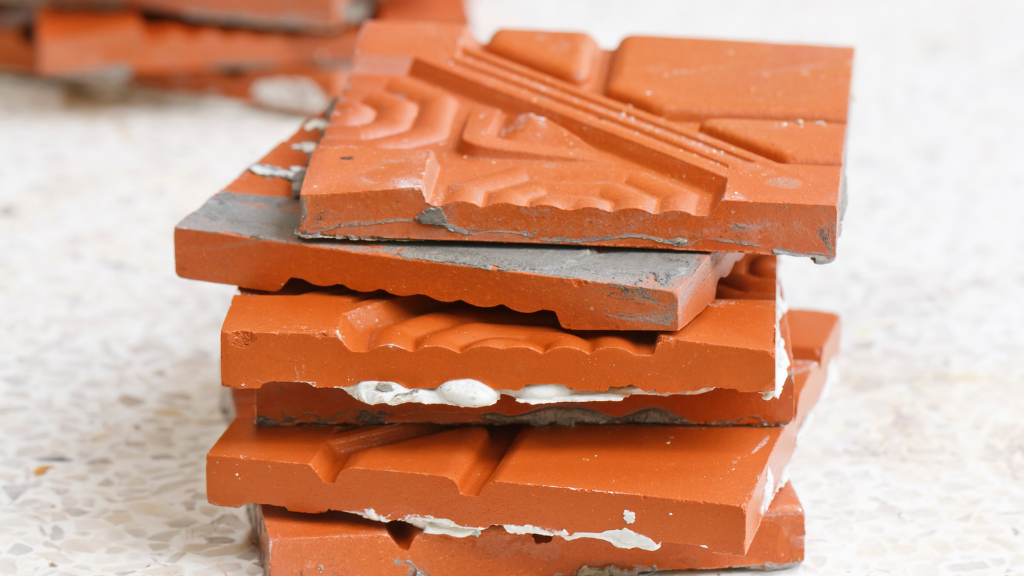
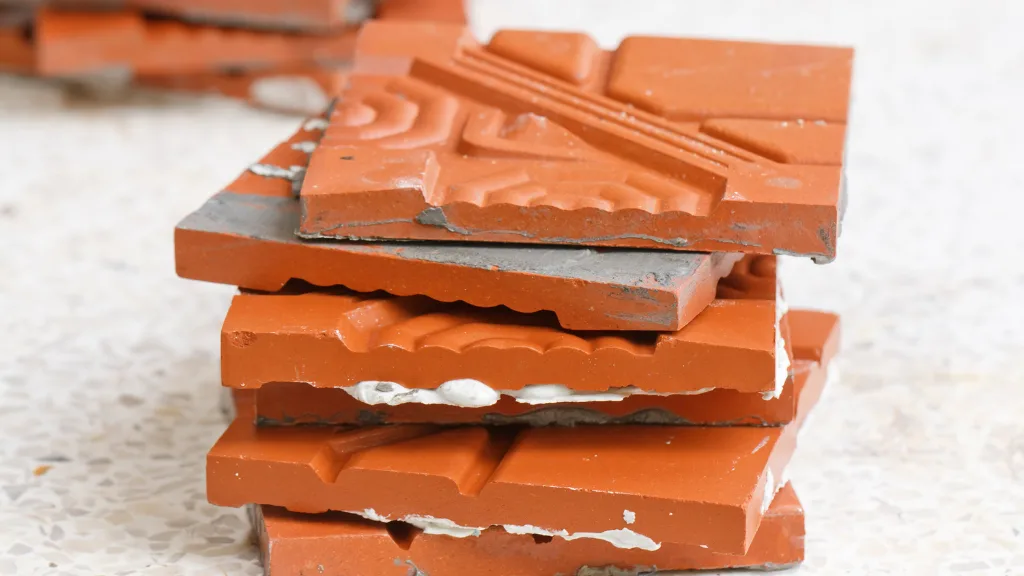
Cracked Tiles
Cracked tiles are one of the most common signs of damage in clay tile roofs. Weathering, impact, or even natural settling of the structure can contribute to tile cracks. Keep an eye out for:
- Small hairline cracks
- Large, visible cracks
- Broken tiles or tiles with missing pieces
To effectively identify cracked tiles, it’s a good idea to periodically inspect your roof, especially after severe weather events.
Roof Leaks
Damage to your clay tile roof can lead to leaks, which can cause more significant problems if not addressed promptly. Signs of a leaking roof include:
- Water stains on ceilings or walls
- Damp spots or mold growth in the attic
- Visible holes or gaps in the roofing tiles
If you notice any of these signs, it’s essential to locate and repair the source of the leak. This may involve lifting up the surrounding tiles, filling any holes with roofing cement, and replacing any broken or cracked tiles.
Aging Roof Tiles
As your clay tile roof ages, it may experience some deterioration, such as:
- Erosion of the surface
- Fading, chipping, or flaking of the original color
- Spalling (in freezing climates, where tiles can crack from the cycle of freezing and thawing)
Regular maintenance and inspection can help identify and remedy these issues before they become more serious. Keep your roof clean, free of debris, and replace any damaged tiles as needed.
By staying vigilant and maintaining your clay tile roof, you can help ensure its longevity and continued effectiveness in protecting your home. Remember to always use caution when inspecting or working on your roof to avoid injury or further damage to the tiles.

Repair Tools and Materials
Pry Bar and Crowbar
A pry bar and crowbar are essential tools for your clay tile roof repair. You’ll need these tools to remove damaged tiles and lift up the surrounding tiles to inspect for further damage.
A pry bar is useful for removing nails holding the tiles in place, while the crowbar can help you lift and remove the tiles more easily.
Hammer and Wet Saw
A hammer and wet saw are important tools for this repair job. The hammer is used to secure new tiles into place with appropriate nails. On the other hand, a wet saw is designed to cut through your clay tiles with precision, helping you to create a clean and precise fit for any replacement tiles that may be needed.
Mortar
Mortar is a crucial material in tile roof repair. It holds the tiles in place and provides a solid structure for your roof.
During the repair process, you’ll need to assess the mortar between the tiles to ensure that it’s still intact and not crumbling.
If you find any loose or damaged mortar, you’ll need to replace it with a new mixture to effectively repair your clay tile roof.
When gathering your tools and materials for clay tile roof repair, make sure to also have a caulk gun, waterproof membrane, and roofing felt available. These items will help to seal and protect the repaired area, ensuring that it is watertight and long-lasting.
Remember that using the right tools and materials for your specific repair scenario is vital for a successful, effective repair.
Safety Precautions
Ladder
When working on a clay tile roof repair, it’s essential to prioritize your safety. Start by setting up a stable, properly positioned ladder to access the roof.
Make sure it is firmly placed on the ground and leans against a sturdy part of the building. Follow these guidelines for ladder safety:
- Always maintain a 1:4 ratio between the ladder’s height and the distance from the wall.
- Secure the ladder’s top and base to prevent slippage.
- Don’t overreach or lean sideways while on the ladder.
- Make sure the ladder has non-slip feet.
Secure Harness
Another crucial safety measure is wearing a secure safety harness. This will help prevent falls, which can lead to severe injuries. To effectively use a safety harness, consider the following:
- Choose a full-body harness that fits comfortably and is appropriate for your size and weight.
- Connect the harness to a secure anchor point on the roof, such as a rafter or beam.
- Always inspect your harness and other safety equipment for signs of wear before using it.
Besides ladder safety and wearing a secure harness, keep in mind other safety precautions, such as:
- Wearing leather gloves to protect your hands from cuts and scrapes.
- Using protective safety glasses to shield your eyes from debris.
- Being mindful of any hazardous substances or electrical safety hazards on the roof.
- Working with a partner or having someone nearby in case of emergencies.
By following these safety precautions, you can ensure a safer and more efficient clay tile roof repair experience.
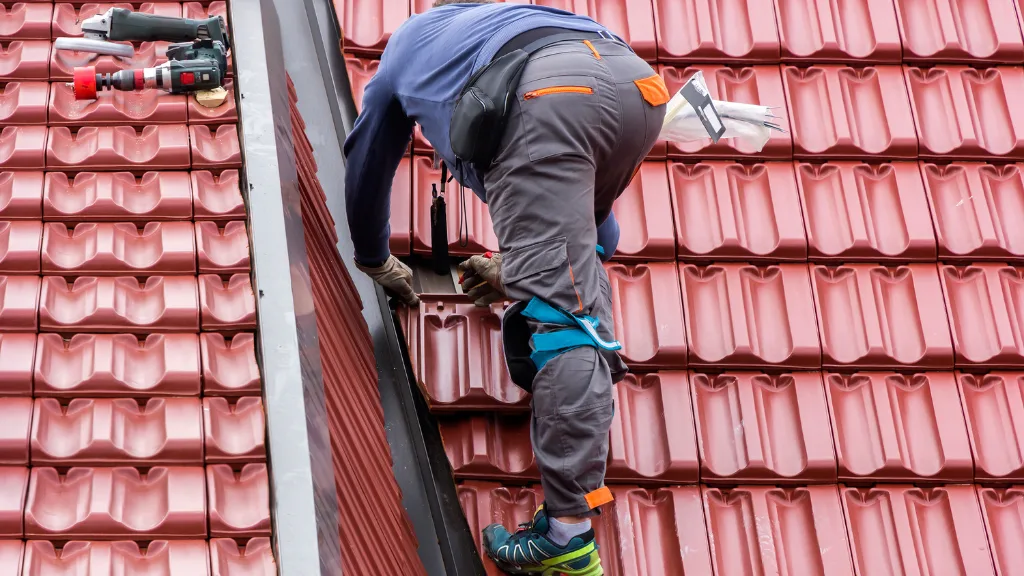
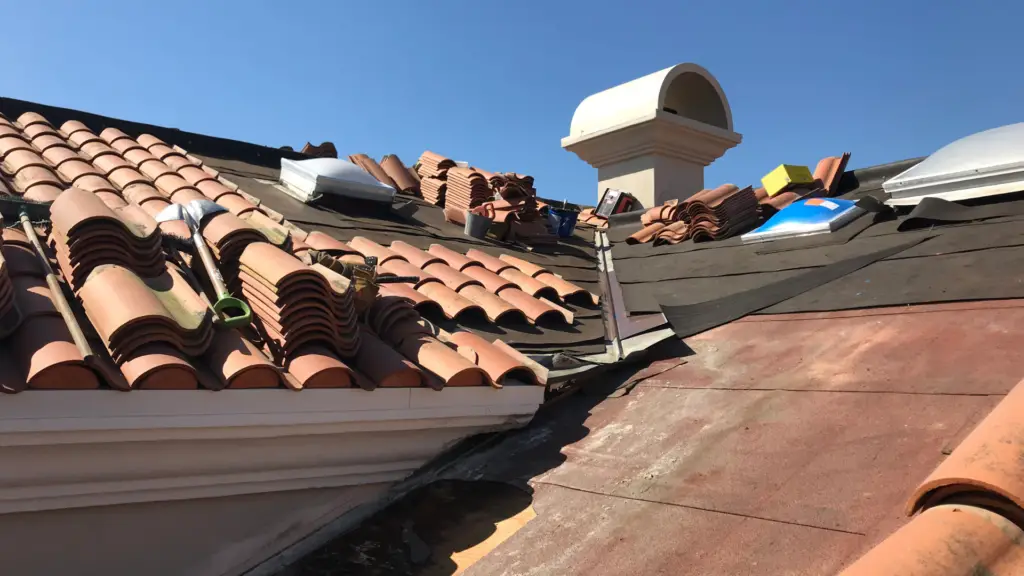
Assessing and Removing the Damaged Tiles
Locate and Identify Damaged Tiles
First, to properly assess the condition of your clay tile roof, you should inspect the entire roof for damaged or broken tiles. Wear sturdy shoes and use a ladder to access the roof safely.
As you examine the tiles, be on the lookout for cracks, chips, and missing sections. Clay tiles can break down over time due to weather conditions or other factors, making roof maintenance crucial.
It’s essential to avoid walking on clay tile roofs, as this can cause further damage, leading to costly repairs. Instead, take note of the affected areas, and prepare for the next steps to fix the problem.
Removing Broken Tiles
Gather your necessary equipment, such as:
- Foldable ladder
- Pry bar or crowbar
- Sturdy shoes
- Hammer
- Replacement tiles
Once you’ve identified the damaged tiles, you can begin the process of removing them. Remain at a safe distance from the edge of the roof and start removing the broken tiles one at a time.
Slide a pry bar or crowbar under the damaged tile, lifting it gently to avoid causing any additional damage to the surrounding tiles.
If you cannot access the nails holding the tile in place, use a hammer and the pry bar to drive the nails down into the wood battens or roof sheathing, rather than trying to pry them out. Be careful not to damage adjacent tiles during this process.
After removing the broken or cracked tiles, you’ll need to replace them with new ones. Make sure you have adequate replacement tiles on hand before beginning the repair process.
For more complex repairs or if you’re unsure about any aspect of the tile roof repair process, consider contacting a professional roofing company to ensure safety and proper clay tile roof maintenance.
Tile Replacement Process
Selecting Replacement Tiles
When choosing replacement tiles for your clay tile roof, consider the following factors:
- Quality: Ensure that the new tiles are of high quality, matching the durability of your existing roofing tiles.
- Colors and Glaze: Select tiles that closely match the color and glaze of the existing ones to maintain the appearance of your roof.
- Brands: Stick to reputable brands known for producing reliable clay tiles.
- Budget: Find tiles that fit within your budget without compromising on quality.
- Material: If possible, choose slate or other durable materials that can withstand harsh weather conditions.
It is important to consult with a professional roofing company when selecting replacement tiles to make the right choice.
Installing New Tiles
Follow these steps to replace broken clay tiles on your roof:
- Inspect the damage: Examine your entire roof to identify all the broken tiles.
- Gather the necessary equipment: You will need a ladder, sturdy shoes, replacement tiles, nails, a hanger strap, a wet saw, a hammer, a pry bar, a caulk gun, mortar, and a waterproof membrane.
- Remove the damaged tiles: Carefully lift the tile(s) above the damaged one(s) using a pry bar, taking care not to cause further damage. Prop them up with blocks of wood or a hanger strap. Gently slide a wood wedge or crowbar under the broken tile to remove it. You may need to cut nails holding the damaged tile in place using the wet saw.
- Install the new tiles: Slide the new replacement tile into position, ensuring it securely fits with surrounding tiles. Fasten it using nails and/or straps, as necessary.
- Apply waterproof membrane: Apply mortar, a caulk gun, or both to seal the area around the newly installed tile to prevent water intrusion. Install the waterproof membrane underneath the new tile, if required.
Remember to follow all safety precautions while working on your roof and seek professional assistance if needed.

Alternative Repair Methods
Mortar Bedding
When dealing with clay tile roof repair, another method you can try is mortar bedding. Begin by removing any loose mortar from the affected area. You will need to create a new mortar mix to reattach the tiles securely.
To prepare the mortar, follow the manufacturer’s instructions, usually combining water and mortar mix in a bucket. Stir the mixture until it acquires a thick consistency.
Apply the prepared mortar to the area where the tile needs to be reattached. Ensure that you spread the mortar evenly using a trowel, creating a bed for the tile to sit on.
Afterwards, press the tile firmly into the fresh mortar bed and allow ample time for it to dry before moving on to any other repairs necessary. Keep in mind that mortar bedding might not be suitable for all roofing materials or roof pitches.
Waterproof Membrane
A waterproof membrane can be used as a temporary solution for damaged clay tile roofs. This method is especially helpful when a cracked roof tile cannot be replaced immediately.
First, assess the damaged area to determine the appropriate size for the membrane.
Materials you will need for this repair include:
- Roofing felt or waterproof membrane
- Roofing adhesive (such as RT-600 for roof sealing)
- Scissors or utility knife
- Gloves for protection
Begin by cutting a piece of roofing felt, waterproof membrane, or flashing strip to the correct size, ensuring it is slightly larger than the area to be covered.
Put on your gloves and apply a liberal amount of roof adhesive to the membrane’s underside.
Next, press the membrane over the cracked or damaged tile, making sure it adheres completely to the roof’s surface. This method can provide a temporary waterproof seal until a more permanent repair can be completed.
Estimating Repair Costs
When planning a clay tile roof repair, it is essential to estimate the costs associated with fixing your roof. Different factors contribute to the overall repair expenses, and understanding them can help you create a reasonable budget for the project.
First, you need to assess the extent of the damage. Some common issues with clay tile roofs include:
- Slipped or loose tiles
- Broken or cracked tiles
- Leaking tiles
- Damaged or missing flashing
Each of these problems has different repair costs associated with them. For instance:
- Slipped or loose tiles: The cost to fix slipped or loose tiles typically ranges from $5 to $25 per square foot.
- Broken or cracked tiles: For this type of damage, you can expect repair costs to fall between $500 and $2,500.
- Leaking tiles: Leaking tile repairs usually cost around $200 to $600, depending on the extent of the problem.
- Damaged or missing flashing: Repairing or replacing metal flashing can cost anywhere from $500 to $1,800.
Next, consider the size of the affected area. A larger area will generally lead to higher repair costs. For example, repairing a 10-foot x 10-foot area of damaged steel tiles in a 1,500 sq. ft. roof might cost about $1,800.
Don’t forget to factor in material costs as well. Depending on the specific type of clay tile you use or any roofing membranes or sealants necessary, your material costs may vary.
Lastly, labor costs largely depend on your location and the contractor you choose to work with. Remember to obtain multiple quotes from different professionals to compare rates and find a quality service that fits within your budget.
By considering these factors, you can more accurately estimate the cost of your clay tile roof repair and proceed with the project confidently.

Professional Assistance
When dealing with clay tile roof repair, it’s always a good idea to consider hiring a professional roofing company.
Although some small repairs can be done on your own, a professional will have the expertise, tools, and experience necessary to ensure a proper job.
A professional roofing company will be well-versed in handling various types of roof tiles, including clay tiles.
They have the experience to assess the extent of damage on your tiled roof and determine the best course of action. Some of the tasks professionals handle include:
- Inspecting the roof for damage, including cracks, broken tiles, and leaks.
- Identifying the cause of damage, whether due to weather, poor installation, or other factors.
- Repairing or replacing damaged roof tiles.
- Ensuring the waterproof membrane is in good condition and replacing it if necessary.
- Removing debris from the roof and cleaning the tiles.
Here are some advantages of hiring a professional:
- Expertise: Professional roofers have years of experience handling clay tile roofs and can detect and fix issues more efficiently than an untrained individual.
- Safety: Working on a roof can be dangerous, especially with fragile clay tiles. Roofing professionals have the proper safety equipment and training to avoid accidents.
- Warranty: Many professional roofing companies offer a warranty on their work, giving you peace of mind that the repair or replacement will last.
- Time-saving: A professional can usually complete the job more quickly than a DIY homeowner, reducing the risk of further damage due to exposure or delays.
When selecting a roofing company, consider the following:
- Reputation: Look for reviews to understand the company’s reputation and quality of work.
- License and insurance: Ensure the company is licensed and insured to protect yourself in case of accidents or damages.
- Experience: Check if they have handled similar projects with clay tile roofs in the past.
- Communication: Make sure they are responsive and easy to communicate with throughout the entire process.
By leaving your clay tile roof repair in the hands of professionals, you can have the confidence that the job will be completed effectively and safely, ensuring the longevity of your roof.