
Flashing a metal roof to a wall is a crucial step in protecting your home from water damage and leaks.
If you’re installing a new metal roof or replacing an old one, you’ll need to know how to properly flash it to the adjacent wall to ensure a watertight seal.
In this article, we’ll provide you with a step-by-step guide to flashing a metal roof to a wall, including tips on selecting the right materials, tools needed, and installation techniques.
With this knowledge, you’ll be able to confidently install your metal roof and prevent any potential water damage to your home.
Understanding Metal Roof Flashing
Functions of Flashing
Metal flashing serves an essential purpose in maintaining the integrity of your roof. Here are a few functions of flashing that you should be aware of:
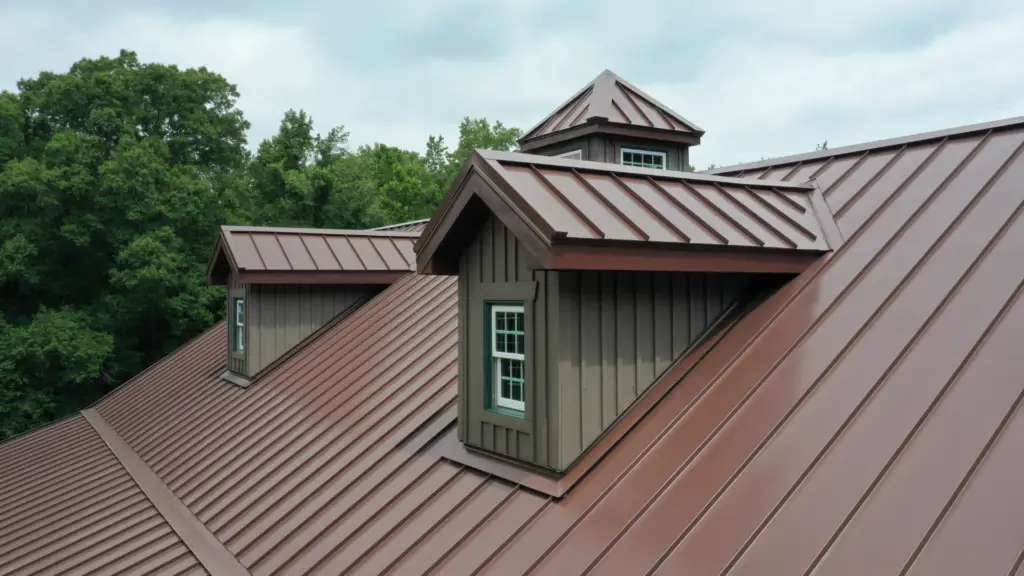
- Protecting vulnerable areas: Flashing acts as a barrier, covering spots where the roof meets walls or other junctions, such as chimneys, dormers, and skylights. It prevents water penetration and helps redirect the flow of water away from these junctions.
- Prolonging the life of your roof: By preventing water ingress and other elements from breaking down your roof’s materials, flashing can extend the overall lifespan of your roof.
- Preventing leaks and damage: Properly installed flashing helps to prevent leaks that can lead to significant structural and interior damage to your property.
Types of Flashing
When working with metal roofs, you’ll need to choose the appropriate type of flashing. Here are a few common types used for metal roofs:
- Step flashing: Often utilized for roof-to-wall intersections, step flashing consists of a series of metal pieces that are bent at a 90-degree angle. The flashing is layered with the roofing material, creating a stair-like effect. This design helps to direct water down the roof and away from the wall.
- Kickout flashing: This type of flashing is installed at the lower termination point of a roof-to-wall intersection, where the metal roof meets the wall. The purpose of kickout flashing is to redirect the water away from the wall and into your gutter system, preventing any seepage into the wall or foundation.
- Counter flashing: Typically used around chimneys or other protrusions, counter flashing is applied above the base flashing. It serves as an additional barrier against water infiltration, ensuring that any water flowing down the vertical surface is channeled away from the roof.
Selecting the correct type of flashing for your project is critical for preventing water damage and maintaining a sturdy, leak-free roof.
By understanding the various functions and types of flashing available for metal roofs, you can make an informed decision to ensure the longevity and performance of your roofing system.

Preparation and Tools
Gather Required Tools
Before starting the process of flashing a metal roof to a wall, it’s important to gather all the necessary tools and materials. This will make the process smoother and more efficient. Some essential tools you’ll need are:
- Metal cutting snips
- Impact driver with appropriate bits
- Rivet gun
- Tape measure
- Galvanized metal flashing
- Foam closures
- Rubber pipe boot
- Metal roofing fasteners (screws)
Inspect Existing Wall and Roof
Before you start flashing the metal roof to the wall, take the time to inspect both the siding and metal roofing. Ensure the siding is in good condition and can withstand the process. If there are any damaged or missing sections, repair or replace them as necessary.
For the metal roof, check the condition of the underlayment and metal roofing materials.
If there’s any sign of damage or wear, it’s best to address these issues before proceeding with the flashing process. Doing so will ensure a more secure and long-lasting connection between the roof and the wall.
Remember, a successful flashing process starts with proper preparation and having the right tools on hand. By following these steps and gathering the necessary materials in advance, you’ll be well on your way to a successful metal roof flashing project.
Installing Eave and Wall Flashing
Install Eave Flashing
First, you need to prepare the eave by cleaning any debris and ensuring that the surface is flat and smooth. Place butyl tape on the eave’s edge, ensuring good adhesion. This will provide a seal beneath the eave flashing and help prevent water intrusion.
Next, measure and cut the eave flashing to the appropriate length. It’s essential to have at least a 1-inch overlap on each piece if you’re installing multiple sections.
After cutting the flashing, place it over the butyl tape, aligning it with the eave’s edge.
Fasten the eave flashing using appropriate fasteners, such as screws or nails, at intervals of around 12 inches. Make sure to use high-quality fasteners made of the same material as the flashing to avoid corrosion.
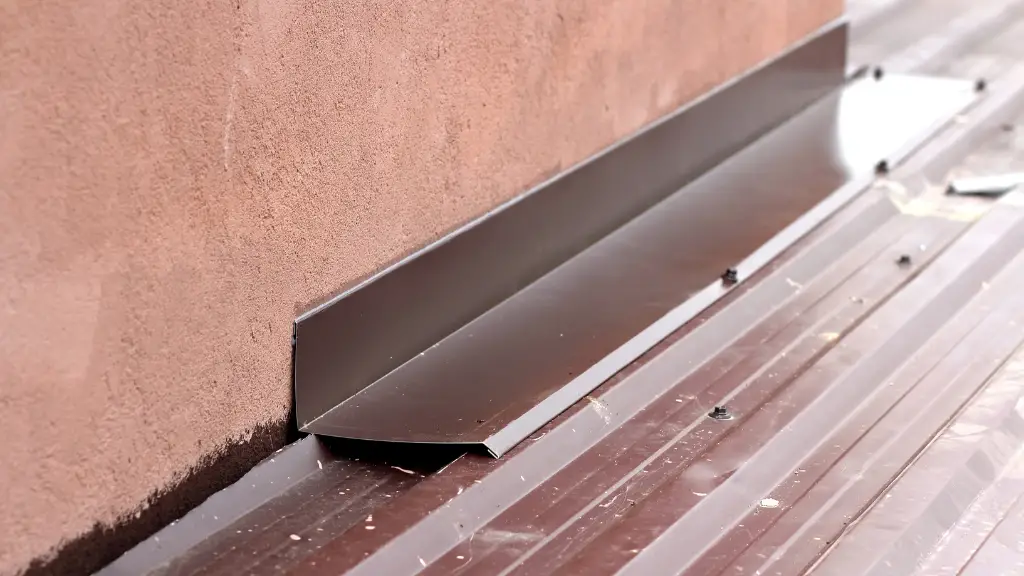
Install Wall Flashing
Before installing wall flashing, ensure that the wall surface is clean and free of debris. Additionally, install a weather-resistant membrane, such as housewrap, to cover the wall and protect it from moisture.
- Install step flashings: Measure and cut step flashings – we recommend 12-in.-wide flashings with a 5-in. roof leg and a 7-in. wall leg for optimal protection. Place a piece of step flashing at the beginning of each course of shingles or roofing panels, ensuring that the wall leg is against the wall and the roof leg is on the roof. Fasten the flashing to the roof using appropriate fasteners.
- Overlap and seal: Ensure that each successive step flashing piece overlaps the previous one by around 2 inches. This will create a shingle-like pattern that effectively directs water away from the wall.
- Install counterflashing: Counterflashing is used to cover the step flashings and further protect the wall from water intrusion. Measure, cut, and bend the counterflashing according to the wall’s shape. Attach the counterflashing to the wall using fasteners, ensuring a tight seal.
By properly installing eave and wall flashing on your metal roof, you can prevent water from penetrating these critical transition areas and protect your home from potential moisture-related issues.

Endwall and Sidewall Flashing Installation
Install Endwall Flashing
To ensure proper endwall flashing installation on your metal roof, follow these steps:
- Mark the trim: Measure 6″ from the end and ⅛” up from the hem on the hem side of the trim. Make a mark using a pencil or marker.
- Notch the hem: Use metal cutting snips to cut along the marked line, creating a notch in the hem of the endwall.
- Pry open adjacent piece: On the adjacent endwall piece, carefully pry open the hem 6″ using a flathead screwdriver, allowing it to slide into the notched piece.
- Apply sealant: As an additional protection against water penetration, place a silicone sealant at all overlaps where the endwall flashing pieces meet.
Install Sidewall Flashing
For sidewall flashing installation on a metal roof, follow these steps:
- Mark the pitch angle: At the top edge of your sidewall trim, starting at the corner, mark the pitch angle of your roof.
- Make a parallel line: Create a parallel line 1″ from your initially marked pitch angle.
- Mark a straight line: On the lower section of the sidewall flashing, draw a straight line across from the 1″ angled line.
- Remove sections: With metal cutting snips, carefully remove the sections marked with an “X.”
- Attach the flashing: Fasten the sidewall flashing to the wall and roof using appropriate screws or nails, maintaining a proper overlap with the metal roofing panels.
By following these instructions, you can successfully install endwall and sidewall flashing on your metal roof, ensuring a durable and watertight seal against potential leaks and weather-related issues.
Sealing and Waterproofing
Apply Sealant and Butyl Tape
To ensure a watertight seal when flashing a metal roof to a wall, start by applying a silicone sealant along the edges where the roof meets the wall.
Next, use butyl tape, a waterproof adhesive tape, on the backside of the metal flashing for added protection. This will create a tight seal against water intrusion.
Install Counterflashing and Reglet
After applying the sealant and butyl tape, it’s time to install counterflashing. Counterflashing serves as an extra barrier to keep water out of the roof-to-wall junction. To attach counterflashing:
- Cut a reglet, a thin groove or slot, into the wall above the metal roof flashing. The reglet should be at least 3/8-inch deep and wide.
- Bend the top edge of the counterflashing into the reglet.
- Secure the counterflashing to the wall with pancake screws, low-profile screws with flat heads that sit flush against the metal surface.
- Fill the reglet with a high-quality, waterproof sealant.
Maintain Proper Overlaps
In order to provide the best protection against water infiltration, it’s important to maintain proper overlaps when installing flashing. When overlapping endwall flashing, make sure to do the following:
- Mark the trim on the hem side 6″ from the end and ⅛” up from the hem.
- Overlap sections by a minimum of 6 inches.
- Apply silicone sealant at the overlaps to create a watertight seal.
By following these steps, you can successfully flash a metal roof to a wall and provide excellent protection against water damage.

Additional Flashing Techniques
In this section, we will discuss two additional flashing techniques: Step Flashing Installation and Valley Flashing Installation.
Both techniques are essential for ensuring the longevity and water-tightness of your metal roof-to-wall connections.
Step Flashing Installation
When installing step flashing, follow these guidelines:
- Begin by measuring your roof’s slope and wall abutment to determine the appropriate length and width of step flashing. Ideally, use 12-inch-wide step flashings bent for a 5-inch roof leg and a 7-inch wall leg.
- Cut your step flashing pieces to the desired size and bend them to fit the roof-to-wall intersection.
- Place the first piece of step flashing at the bottom of the roof slope and slide it underneath the bottom shingle or panel. Secure the flashing to the wall with roofing nails or screws.
- Install subsequent pieces of step flashing, overlapping each previous piece as you work your way up the roof slope. Ensure that water will flow over each piece, avoiding any potential leaks.
- Trim any overlapping housewrap or membrane and tape the seams over the step flashing using flashing tape.
For extra protection, consider using foam closure strips for sealing gaps between the flashings and roof panels.
Valley Flashing Installation
Valleys are among the most vulnerable areas of a metal roof. Follow these steps to install valley flashing correctly:
- Clean and dry the valley area, making sure there are no debris or moisture that could compromise the flashing installation.
- Install a layer of self-adhesive waterproof membrane to the valley, extending it at least 18 inches on either side of the valley centerline.
- Place and secure the valley flashing on top of the membrane, ensuring to center it over the valley. Be mindful of the metal roof’s expansion and contraction, so use slip joints or expansion cleats where necessary.
- Overlap the metal roof panels onto the valley flashing, maintaining a minimum 1-inch gap between the panels’ cut edges and the valley centerline.
- Seal the valley flashing’s edges with roofing cement, flashing tape, or a compatible sealant, and install foam closure strips if needed to close any remaining gaps between the flashing and roof panels.
By following these additional flashing techniques for step and valley installations on your metal roof, you will provide additional protection against potential water infiltration and ensure a long-lasting, weather-tight roof-to-wall connection.
Finishing Touches and Maintenance
Clean Up Metal Shavings
When installing a metal roof, it’s crucial to clean up any metal shavings that result from cutting and trimming the metal panels.
Leaving metal shavings on the roof can lead to rust and damage over time. You should sweep or use a magnetic sweeper to collect metal shavings that may have fallen on the roof, gutter, or ground around your home.
Check for Proper Drainage
Proper drainage is essential for a well-functioning roof system. You can ensure that the water flows away from the foundation of your house by:
- Inspecting and clearing the gutters regularly
- Making sure the downspouts are diverting water away from the foundation
- Checking for any signs of water pooling around the base of your home
Maintain Roof and Flashing Over Time
Maintaining your roof and its flashing will help prolong its lifespan and prevent leaks. Follow these steps for regular maintenance:
- Inspect the flashing at the roof-to-wall intersection regularly for signs of damage, corrosion, or detachment from the wall.
- Examine the membrane and roof underlayment, if applicable, for any signs of wear or damage.
- Clear any debris build-up, such as leaves or branches, from the roof surface to prevent water from collecting on the roof.
In summary, taking care of your metal roof involves cleaning up metal shavings, ensuring proper drainage, and diligently maintaining the roof and flashing over time. Following these steps will help maintain the performance and longevity of your metal roof system.
Further Resources
Homeowner Guides
As you venture into the world of metal roofing, it’s important to have access to informative homeowner guides to help you understand the process and product options.
The Western States Metal Roofing Learning Center offers a wealth of knowledge tailored for homeowners, covering topics such as material selection, maintenance, and technical information on various roofing panels.
You can find blog articles and extensive guides to help you make informed decisions regarding your metal roof.
Installation Help
If you’re looking to install a metal roof to a wall, you may need some guidance to ensure a proper and safe installation process.
While this article provides a starting point, you can also refer to YouTube, where you can find several step-by-step video tutorials showcasing best practices for flashing a metal roof to a wall.
This will not only help you visualize the installation process, but also guide you through the necessary steps to achieve a successful end-result.
Learning Center for Design and Installation
For a more in-depth understanding of metal roof design and installation techniques, look for a learning center specific to the roofing industry.
These centers typically offer a combination of articles, videos, and interactive tools to help you learn and apply design principles for your gable, hip, or other roof styles.
By accessing these resources, you can ensure that your metal roof integrates seamlessly with your building’s design while maintaining the desired functionality.
Below are a few tools and resources to help you explore design options and installation techniques:
- Roofing design calculators
- Interactive color tools
- Technical specification sheets for various roofing materials
- Maintenance tips and best practices
By utilizing these resources, you can gain the knowledge and confidence needed to flash a metal roof to a wall properly. Good luck with your project!