

Are you looking to install gutters on your home but don’t have a fascia board? Don’t worry, it’s still possible! In this helpful guide, we’ll show you how to install gutters without a fascia board and keep your home protected from rainwater damage.
Whether you’re a DIY enthusiast or a homeowner looking to save some money, this article has got you covered. So, let’s dive in and learn how to install gutters like a pro!
Assessing Your Roof for Gutter Installation
Before installing gutters without a fascia board, you need to assess your roof to ensure that it is suitable for gutter installation. Here are some steps to follow:
Checking the Slope of Your Roof
The slope of your roof is an important factor to consider when installing gutters. If the slope is too steep, water may flow too quickly and overwhelm your gutters.
If the slope is too shallow, water may not flow properly, leading to standing water and potential damage to your roof.
To check the slope of your roof, you can use a level and a tape measure. Place the level on the roof and measure the distance from the roof to the level at both ends.
The difference in height between the two points is the slope of your roof. A slope of 1/2 inch per foot is recommended for gutter installation.
Measuring the Length of Your Roof
Measuring the length of your roof is also important to determine the amount of gutter material needed. You can use a measuring tape or a long rope to measure the length of your roof.
Be sure to add extra length for corners and downspouts.
Once you have measured the length of your roof, you can use a gutter sizing chart to determine the appropriate size of gutter material. The size of the gutter will depend on the amount of rainfall in your area and the size of your roof.
In summary, assessing your roof for gutter installation involves checking the slope of your roof and measuring the length of your roof.
By following these steps, you can ensure that your roof is suitable for gutter installation and determine the appropriate size of gutter material needed.

Assessing Your Roof for Gutter Installation
Before installing gutters without a fascia board, you need to assess your roof to ensure that it is suitable for gutter installation. Here are some steps to follow:
Checking the Slope of Your Roof
The slope of your roof is an important factor to consider when installing gutters. If the slope is too steep, water may flow too quickly and overwhelm your gutters.
If the slope is too shallow, water may not flow properly, leading to standing water and potential damage to your roof.
To check the slope of your roof, you can use a level and a tape measure. Place the level on the roof and measure the distance from the roof to the level at both ends.
The difference in height between the two points is the slope of your roof. A slope of 1/2 inch per foot is recommended for gutter installation.
Measuring the Length of Your Roof
Measuring the length of your roof is also important to determine the amount of gutter material needed. You can use a measuring tape or a long rope to measure the length of your roof.
Be sure to add extra length for corners and downspouts.
Once you have measured the length of your roof, you can use a gutter sizing chart to determine the appropriate size of gutter material. The size of the gutter will depend on the amount of rainfall in your area and the size of your roof.
In summary, assessing your roof for gutter installation involves checking the slope of your roof and measuring the length of your roof. By following these steps, you can ensure that your roof is suitable for gutter installation and determine the appropriate size of gutter material needed.

Materials You Will Need
When installing gutters without a fascia board, you will need a few materials to get started. Here are the main items you will need:
Gutters
You will need to purchase gutters that are the correct length for your home. Measure the length of the roofline where you plan to install the gutters and purchase gutters that match that length.
Gutters are typically sold in 10-foot sections, so you may need to purchase multiple sections to cover the entire roofline.
Downspouts
Downspouts are used to direct water from the gutters away from the house. You will need to purchase downspouts that match the size of the gutters you are installing.
Downspouts are typically sold in 10-foot sections, so you may need to purchase multiple sections to cover the entire length of the gutter.
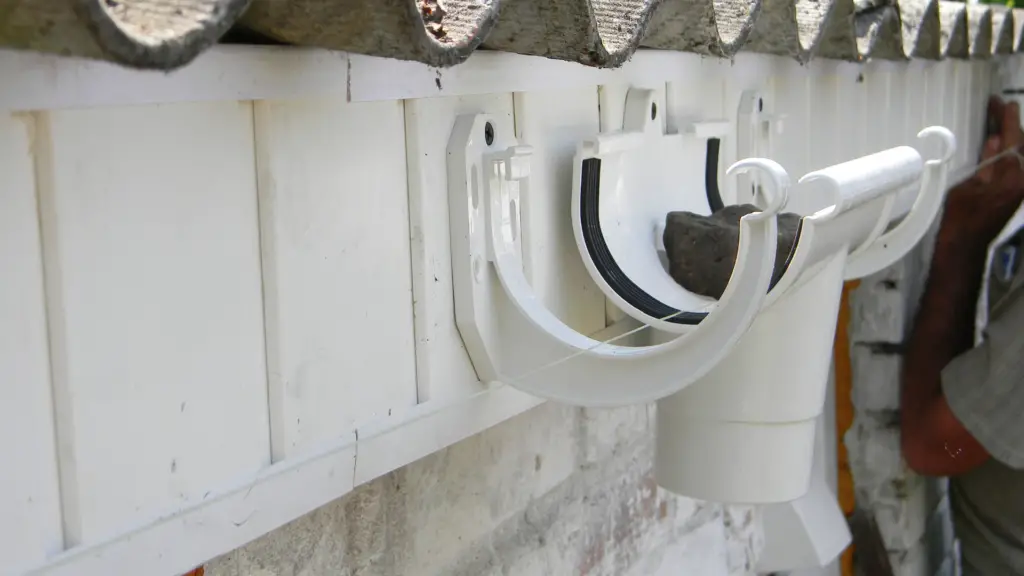
Mounting Brackets
Mounting brackets are used to attach the gutters to the roofline. You will need to purchase mounting brackets that match the size of your gutters.
The number of mounting brackets you will need will depend on the length of the gutter and the slope of the roof.
When purchasing materials, make sure to choose high-quality materials that will last for many years. It is also important to choose materials that match the style and color of your home.
Once you have all of the necessary materials, you can begin the installation process.

Preparing Your Roof for Gutter Installation
Before you begin installing gutters without fascia boards, you need to prepare your roof. This involves cleaning the roof and sealing the roof edge.
Follow these steps to prepare your roof for gutter installation.
Cleaning Your Roof
The first step in preparing your roof for gutter installation is to clean your roof. This will ensure that your gutters are properly installed and will function effectively. Here are the steps to clean your roof:
- Remove all debris from your roof, including leaves, twigs, and other debris.
- Use a power washer or hose to clean your roof thoroughly.
- Check for any damaged or missing shingles and replace them if necessary.
- Allow your roof to dry completely before moving on to the next step.
Sealing the Roof Edge
After cleaning your roof, the next step is to seal the roof edge. This will prevent water from seeping under the shingles and damaging your roof.
Here are the steps to seal your roof edge:
- Apply a bead of roofing sealant along the roof edge, starting at the corner of the roof.
- Use a putty knife to spread the sealant evenly along the roof edge.
- Continue applying the sealant along the entire roof edge.
- Allow the sealant to dry completely before moving on to the next step.
By following these steps, you can prepare your roof for gutter installation without fascia boards.
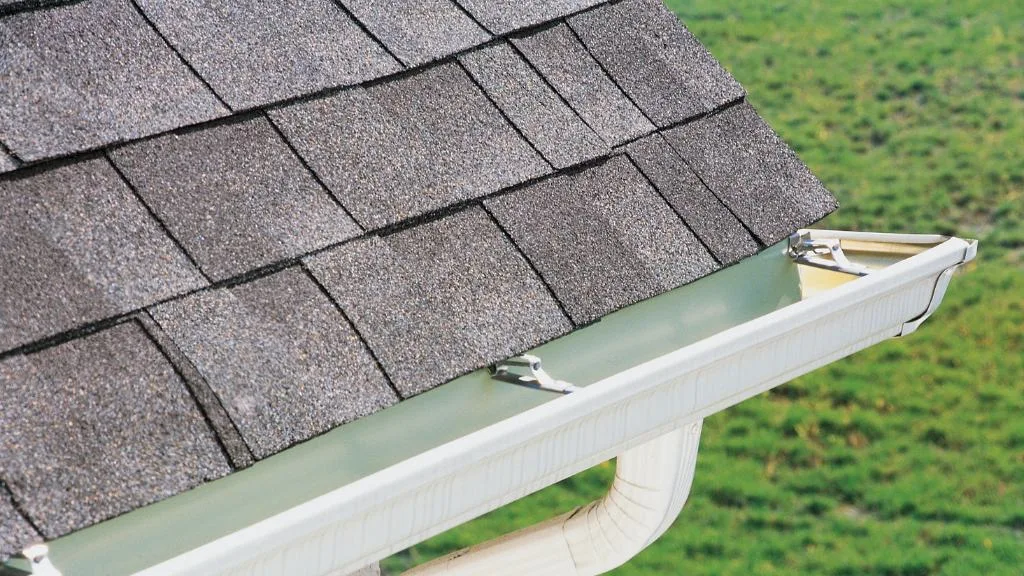
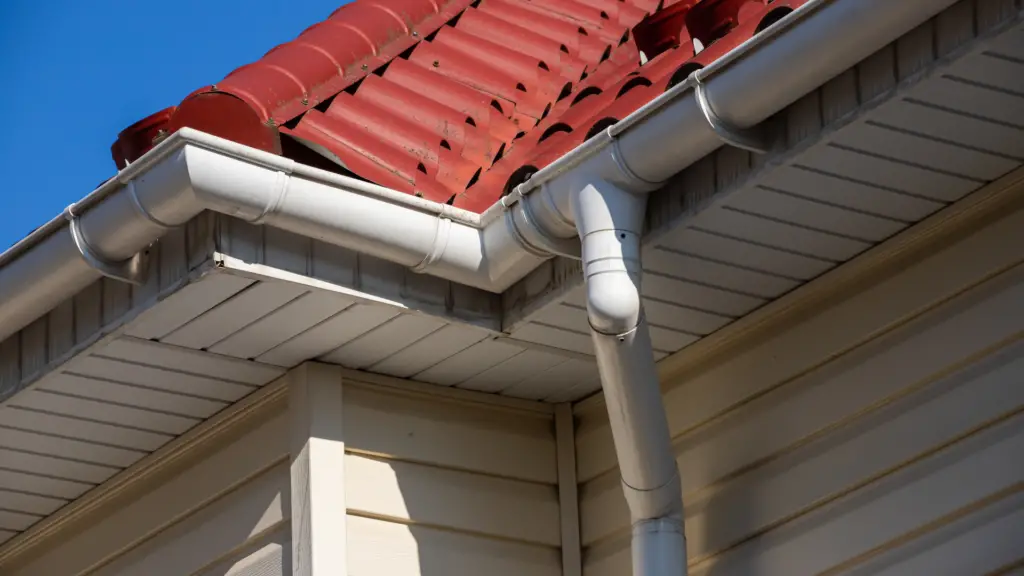
Installing Gutters Without Fascia Board
If you’re installing gutters without a fascia board, you’ll need to use mounting brackets to secure them.
Here’s a helpful guide to walk you through the process.
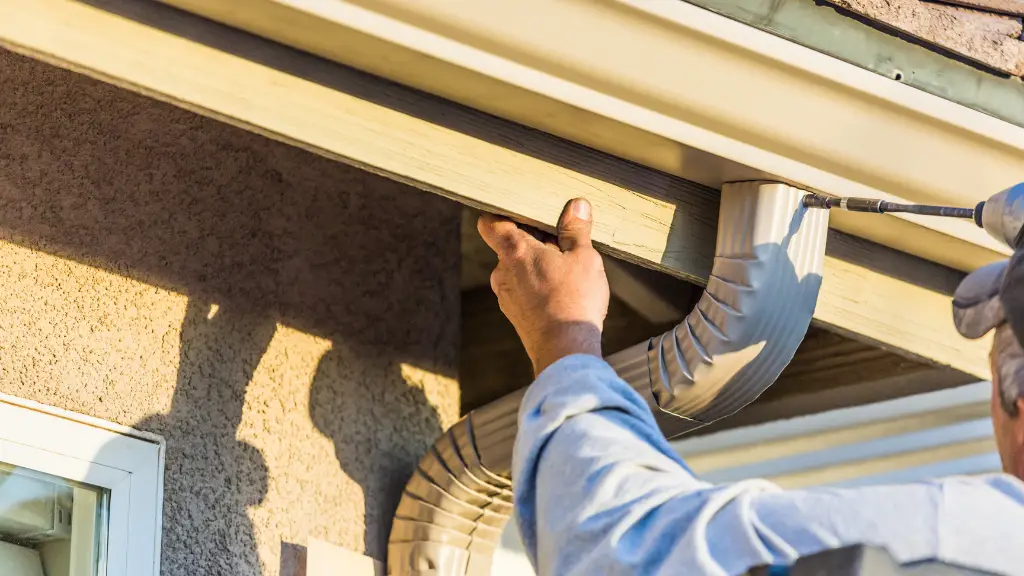
Attaching the Mounting Brackets
First, measure the length of your roofline to determine how many brackets you’ll need. Typically, you’ll want to install one every two feet. Mark the spots where the brackets will go with a pencil.
Next, attach the mounting brackets to the roof using screws. Make sure they’re level and securely fastened. If your roof is made of metal, you can use metal screws. If it’s made of shingles, use wood screws.
Hanging the Gutters
Once the brackets are in place, you can hang the gutters. Start at one end of the roofline and work your way across. Place the gutter into the brackets and secure it with screws.
Make sure the gutter is sloping slightly towards the downspout. This will ensure that water flows properly and doesn’t pool in the middle of the gutter.
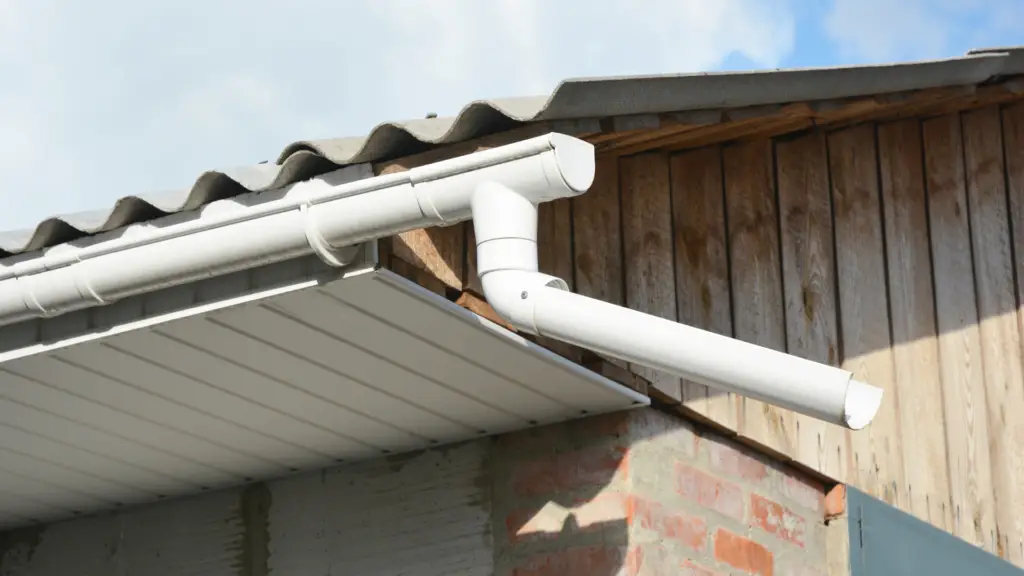
Connecting the Downspouts
Finally, you’ll need to connect the downspouts to the gutter. Measure the distance between the gutter and the ground and cut a downspout to fit. Attach the downspout to the gutter using screws.
If you need to connect multiple downspouts, use a Y-shaped connector. This will allow you to direct water to different areas of your yard.
That’s it! With these simple steps, you can install gutters without a fascia board and protect your home from water damage.

Testing Your Gutters
Once you have installed your gutters, it’s essential to test them to ensure they are functioning correctly. Testing your gutters will help you identify any leaks or clogs that may cause water damage to your home.
Here are some steps to follow when testing your gutters:
- Inspect the gutters: Check for any visible signs of damage, such as cracks or holes. Ensure that the gutters are securely fastened to the fascia board or other support structures.
- Flush the gutters: Use a garden hose to flush water through the gutters. Check for any leaks or clogs that prevent water from flowing freely. You can also use a bucket of water to test the gutters if you don’t have access to a garden hose.
- Check the downspouts: Make sure that the downspouts are correctly positioned and connected to the gutters. Ensure that the downspouts are not clogged and that water flows freely through them.
- Observe the water flow: Watch the water flow through the gutters and downspouts. Ensure that the water flows away from your home’s foundation and not towards it. If you notice any areas where water pools or flows in the wrong direction, you may need to adjust the gutters’ slope.
- Repeat the test: Test your gutters periodically, especially after heavy rainfall. Regular testing will help you identify any issues before they cause significant damage to your home.
By following these steps, you can ensure that your gutters are functioning correctly and protecting your home from water damage. If you notice any issues during the testing process, address them promptly to prevent further damage.
Conclusion
In conclusion, installing gutters without a fascia board is possible and can be done through various methods. You can choose to install an L-shaped gutter system, use a roof hanger bracket, or install a roof drip edge.
Each method has its own advantages and disadvantages, so it’s important to choose the one that best fits your needs and budget.
When installing gutters without a fascia board, it’s important to take into consideration the pitch and material of your roof, as well as the type of gutter you’re installing. It’s also important to ensure that the gutters are properly supported and securely attached to the roof.
Remember to always use proper safety equipment and follow manufacturer instructions when installing gutters. If you’re unsure about how to install gutters without a fascia board, it’s best to consult with a professional gutter installer to ensure that the job is done correctly and safely.
By following the tips and methods outlined in this guide, you can successfully install gutters without a fascia board and protect your home from water damage.
