
Tin roofing is an excellent choice for those looking for a durable and affordable roofing material. However, cutting tin roofing can be a challenging task without the proper tools and techniques.
In this article, we will explore the three best methods for cutting tin roofing, providing you with the knowledge and confidence to tackle this project on your own.
Whether you’re a DIY enthusiast or a professional roofer, read on to learn how to cut tin roofing like a pro.
Method 1: Using Tin Snips
Cutting tin roofing is a task that requires precision and the right tools. One of the most common tools used for cutting tin roofing is tin snips. Tin snips are affordable and easy to use, making them a popular choice for DIYers and professionals alike.
To cut tin roofing using tin snips, you will need to follow these steps:
- Measure the material: Before cutting the tin roofing, you need to measure the material to the required size. Use a measuring tape to ensure that you have the correct measurements.
- Prepare the tools: Make sure that you have the right tin snips for the job. There are two types of tin snips: straight-cut and aviation snips. Straight-cut snips are best for cutting straight lines, while aviation snips can cut curves and circles. Wear protective eyewear and gloves to protect yourself from metal dust and sharp edges.
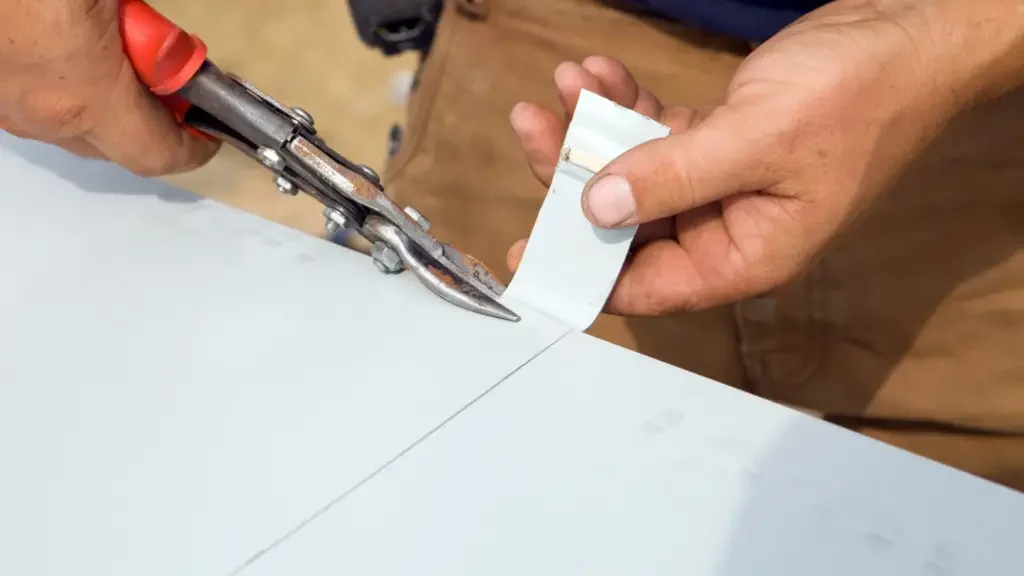
- Cut the material: Hold the tin snips with your dominant hand and the metal sheet with your other hand. Use the snips to make a cut in the material, starting from the edge and moving towards the center. Repeat this process until you have cut the material to the required size.
- Nibblers: Nibblers are another tool that can be used to cut tin roofing. They are especially useful for cutting curves and circles. Nibblers work by punching out small pieces of metal, leaving a clean edge. However, they can be more expensive than tin snips.
When using tin snips, it is important to maintain precision and safety. Make sure that you have a steady hand and that you are cutting in a straight line.
Wear protective gear, including gloves and eyewear, to protect yourself from metal dust and sharp edges.
In conclusion, using tin snips is a cost-effective and efficient way to cut tin roofing. With the right tools and safety gear, you can easily cut metal sheets to the required size and shape.
Method 2: Using Power Shears
If you’re looking for a faster and more efficient way to cut tin roofing, power shears are the way to go. These power tools are designed specifically for cutting through metal sheets, making them an excellent choice for cutting tin roofing.
To get started, you’ll need a few tools and materials, including power shears, a tape measure, a marker, and safety gear such as goggles, a mask, and earplugs. You’ll also need a work surface, such as a workbench, and adjustable clamps to hold the tin roofing in place while you cut it.
Before you begin cutting, take accurate measurements of the area you need to cut and mark it with a marker. This will help ensure precision and accuracy in your cuts.
Next, put on your safety gear and secure the tin roofing to your work surface using adjustable clamps. Make sure it’s firmly in place before you begin cutting.
When using power shears, it’s important to keep the tool at a consistent angle and apply steady pressure to the metal sheet. This will ensure a smooth and clean cut.
Be sure to follow the manufacturer’s instructions for your specific power shears, as they may vary slightly from model to model.
As you cut the tin roofing, be aware of the metal dust that may be produced. This can be harmful to your lungs, so make sure to wear a mask and work in a well-ventilated area.
Overall, using power shears is a great option for cutting tin roofing quickly and efficiently. These tools can be found at most hardware stores and are a must-have for any DIY project involving metal roofing or siding.

Method 3: Using an Angle Grinder
When it comes to cutting metal roofing, an angle grinder can be a powerful tool in your arsenal. It’s a power tool that uses a rotating disc to cut through metal sheets quickly and efficiently.
However, it’s also important to keep in mind that an angle grinder can be dangerous if not used properly. So, before you start cutting, make sure you have all the necessary safety gear, including goggles, a mask, and earplugs.
To begin, you’ll need to set up your work surface. Find a sturdy workbench or table that can support the metal sheets you’ll be cutting.
Secure the metal sheets to the work surface with adjustable clamps to prevent them from moving around while you work.
Next, measure and mark the area where you want to make the cut. Use a tape measure and marker to ensure accuracy and precision.
You can also use a combination square to make sure your lines are straight. Once you’ve marked the area, it’s time to make the cut. Put on your protective eyewear and turn on the angle grinder.
Hold the tool with both hands and slowly lower the spinning disc onto the metal sheet. Make sure you’re applying enough pressure to cut through the metal, but not so much that you damage the blade.
As you cut, be aware of the metal dust that will be created. This can be harmful if inhaled, so make sure you’re wearing a mask and working in a well-ventilated area.
When you’re done cutting, turn off the angle grinder and carefully remove the metal sheet from the work surface. Double-check your measurements and make any necessary adjustments before moving on to the next cut.
Using an angle grinder to cut metal roofing can be a fast and efficient method, but it does require some precision and safety precautions. If you’re not comfortable using power tools, or if you’re working on a smaller project, you may want to consider using shears or a nibbler instead.
These tools are also available at most hardware stores and can be a great option for DIY projects like cutting siding or working with metal roofing around a chimney.