

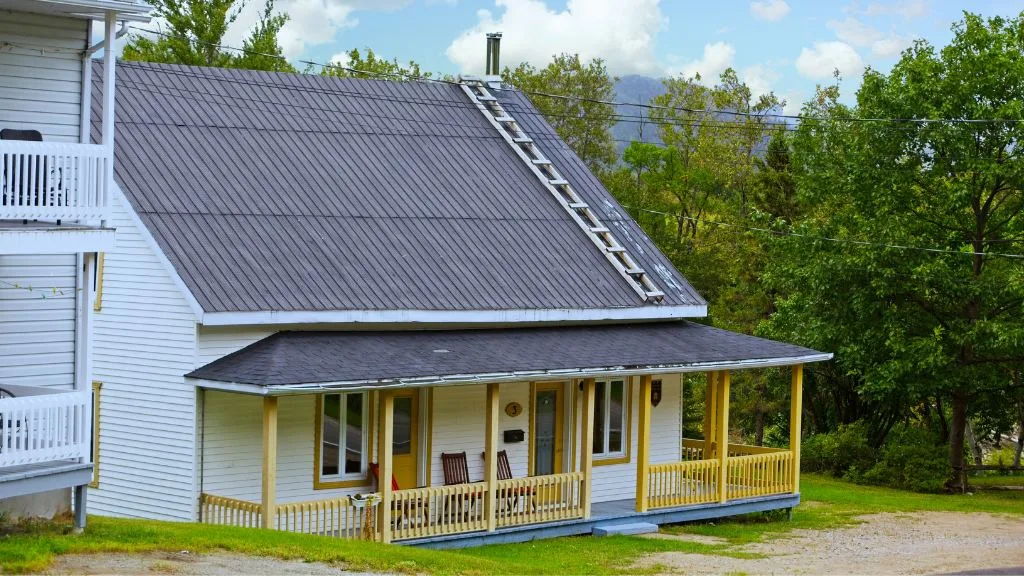
Are you planning to inspect or clean your sloped roof but not sure how to safely place a ladder on it? Putting a ladder on a sloped roof can be intimidating, but it’s not impossible if you follow the right steps.
In this article, we’ll provide you with helpful tips on how to put a ladder on a sloped roof safely and efficiently. Whether you’re a DIY enthusiast or a professional roofer, these tips will ensure that you stay safe and avoid damaging your roof while accessing it.

Assessing the Roof and Choosing the Right Ladder
Measuring the Slope of the Roof
Before you begin the task of putting a ladder on a sloped roof, it is important to assess the slope of the roof. The slope of the roof determines the type of ladder you need to use.
To measure the slope of the roof, you can use a digital level or a carpenter’s level. Place the level on the roof, making sure it is level, and then measure the angle of the roof.
The angle of the roof will determine the ladder you need to use.
Choosing the Right Ladder for the Job
Choosing the right ladder for the job is crucial for your safety. When choosing a ladder, you need to consider the slope of the roof, the length of the ladder, and the material of the roof.
Here are some tips to help you choose the right ladder for the job:
- Extension ladders are the best choice for sloped roofs. They can be adjusted to the right length and angle to fit the roof.
- The ladder you choose should be long enough to reach the roof without leaning it against the gutter or the edge of the roof. A good rule of thumb is to choose a ladder that extends 3 feet above the roofline.
- The material of the roof is also important. If the roof is made of slate or tile, you need to use a ladder with a stabilizer bar to prevent damage to the roof.
When choosing a ladder, make sure it is sturdy and in good condition. Check the weight capacity of the ladder to ensure it can support your weight and any tools or materials you need to bring up to the roof.
In summary, assessing the slope of the roof and choosing the right ladder for the job are essential steps to ensure your safety when putting a ladder on a sloped roof. By following these tips, you can complete the task safely and efficiently.

Preparing the Ladder for Use
Before you start climbing a ladder on a sloped roof, you need to make sure that the ladder is properly prepared for use. Here are a few key steps to follow:
Attaching Ladder Hooks or Stabilizers
If you’re going to be using a ladder on a sloped roof, it’s important to use ladder hooks or stabilizers to keep the ladder stable and secure. Ladder hooks are typically made of metal and can be attached to the top of the ladder to help it grip the roof.
Stabilizers are wider than ladder hooks and are designed to provide a larger base of support for the ladder.
When attaching ladder hooks or stabilizers, make sure that they are securely fastened to the ladder and that they are positioned correctly for the type of roof you will be climbing.
For example, if you are climbing an asphalt roof, you may need to use different types of ladder hooks or stabilizers than you would for a metal or tile roof.
Using a Ladder Leveler
A ladder leveler is a device that can be attached to the bottom of a ladder to help level it on uneven ground. This can be especially important when using a ladder on a sloped roof, as the angle of the roof can make it difficult to keep the ladder level.
To use a ladder leveler, simply attach it to the bottom of the ladder and adjust it until the ladder is level. This can help prevent the ladder from slipping or tipping over while you are climbing.
Using Grippers or Pivit Ladder Tool
Grippers or Pivit Ladder Tools are designed to provide additional stability and support when climbing a ladder on a sloped roof. Grippers are small, rubberized pads that can be attached to the feet of the ladder to help it grip the roof.
Pivit Ladder Tools are larger devices that can be attached to the ladder to provide a wider base of support.
When using grippers or Pivit Ladder Tools, make sure that they are securely attached to the ladder and that they are positioned correctly for the type of roof you will be climbing. It’s also important to make sure that the ladder is level and stable before you start climbing.
By following these steps and using the right equipment, you can help ensure that your ladder is safe and secure when climbing a sloped roof. Remember to always use caution when climbing a ladder and to never take unnecessary risks.


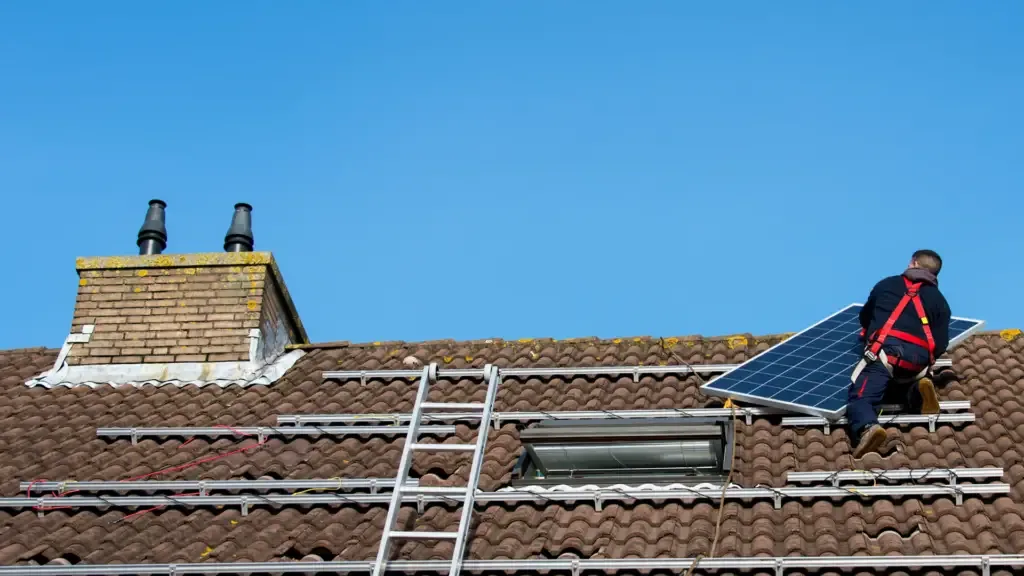
Placing the Ladder on the Roof
When it comes to placing a ladder on a sloped roof, safety should always be your top priority. In order to do this safely, there are a few key things you need to keep in mind.
Here are some helpful tips to ensure that you can safely and securely place your ladder on a sloped roof.
Using Ridge Hooks or a Roof Boot
One of the best ways to ensure that your ladder is securely in place on a sloped roof is to use a roof ladder hook or a roof boot. These ladder tools can help to stabilize your ladder and prevent it from slipping or sliding on the roof surface.
When using a roof ladder hook, make sure that it is securely attached to the roof ridge and that the ladder is placed securely in the hook. A roof boot can also be used to help stabilize the ladder and prevent it from slipping.
Make sure that the boot is securely attached to the ladder and that it is placed on a solid surface on the roof.
Ensuring Stability
Another important factor to consider when placing a ladder on a sloped roof is stability. You want to make sure that the ladder is stable and won’t move or slip while you are using it.
One way to do this is to use ladder stabilizers. These can be attached to the sides of the ladder and can help to keep it stable on the roof surface.
If you don’t have ladder stabilizers, you can also use a rope to tie the ladder to a secure anchor point on the roof. This will help to keep the ladder in place and prevent it from slipping.
Safety First
Finally, it’s important to remember that safety should always come first when placing a ladder on a sloped roof. Make sure that the roof surface is dry and free of debris, as this can cause the ladder to slip.
Always wear sturdy shoes with good traction and use caution when climbing up and down the ladder. If you feel uncomfortable or unsure about placing the ladder on the roof, it’s best to call in a professional to do the job for you.
By following these tips, you can safely and securely place a ladder on a sloped roof. Remember to always prioritize safety and take the necessary precautions to prevent accidents.


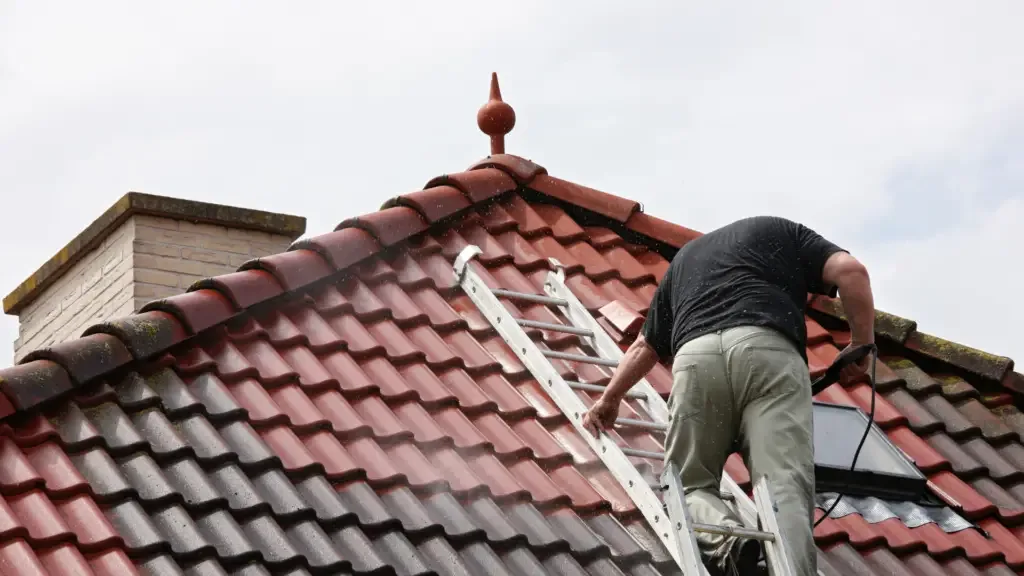
Climbing and Working on the Roof
When climbing and working on a sloped roof, it is essential to maintain balance and safety. Here are some tips to help you stay safe:
Maintaining Balance and Safety
- Always use a sturdy and reliable ladder that is appropriate for the job. A roofing ladder hook or a chicken ladder can be used to secure the ladder to the roof.
- Make sure the ladder is level and secure before climbing up. Ladder levelers can help ensure stability on uneven ground.
- Wear non-slip shoes with good traction to prevent slipping on the roof.
- Keep your center of gravity low and avoid leaning to one side or the other.
- Use caution when carrying tools and materials up and down the ladder. Power tools should be used with care, and cords should be kept away from the ladder and roof edge.
- If possible, avoid working on a roof during wet or slippery conditions. If it is necessary to work during these conditions, use extra caution and consider using a safety harness.
Using a Chicken Ladder
A chicken ladder is a type of ladder that is specifically designed for use on sloped roofs. It is a lightweight and portable ladder that can be easily moved from one location to another.
Here are some tips for using a chicken ladder:
- Make sure the ladder is securely attached to the roof using ridge hooks or other appropriate means.
- Always use the ladder in pairs, with one ladder on each side of the roof.
- Keep the ladder level and secure, using ladder levelers if necessary.
- When climbing up or down the ladder, maintain three points of contact at all times (two hands and one foot, or two feet and one hand).
- Avoid overreaching or leaning too far to one side.
Remember to always prioritize safety when working on a roof. By following these tips and using the appropriate equipment, you can help ensure a safe and successful project.
