The roof truss is the most important structural element of any building, and it’s also one of the most complex.
A properly engineered truss can span long distances without support, and transfer heavy loads to columns or walls with minimal deflection.
- How to Build Roof Trusses
- More Information Needed When Installing Roof Trusses
- Tools You Will Need to Install Trusses
- Hints and Tips in Installing Roof Trusses
- What are Roof Trusses?
- Advantages of Roof Trusses
- Disadvantages of Roof Trusses
- Roof Trusses Make It Easier to Build a Roof
- Do I Need to Hire a Professional to Install My Roof Trusses?
- Conclusion
This article will give you a brief introduction to how they work, what major components are required for their construction, and some common design considerations.
How to Build Roof Trusses
Here are the steps you’ll have to do:
1. The first step in creating roof trusses is to create a design layout that may be drawn by an expert architect or, perhaps more easily, with a specialized program designed to generate roof trusses.
2. The second stage in constructing a roof truss is to gather the supplies. The term “truss” comes from the construction of roof trusses, which are made using various materials.
The following items will be required for this project: There will be wood, a hammer, a saw, galvanized steel roof truss plates and 1 7/8-inch galvanized steel screw.
3. The size of the roof and specifications in the design must be considered while cutting the wood. It must also adhere to any local building regulations and codes.
The majority of the time, wood used is 2×6 and 2 X 8 inches in size despite the fact that it may be thickened depending on the weight it will bear and the overall size of the roof.
More Notes on Building the Roof Trusses
Galvanized steel connection plates are required. It’s a steel with a zinc layer that prevents corrosion from occurring.
- The plates will fit together into the shape of a triangle and be connected using galvanized steel screws that are no longer than 1 5/8 inches long.
- Depending on the wood’s thickness, you may want to use thicker screws.
- If you want to use other substances, such as steel, aluminum, or tin, instead of wood in your roof truss construction, you must first cut the material to match the roof size and design requirements.
- The roof truss construction method may be a little more difficult to master than other methods since you will need to cut the gussets that are employed for providing the required extra support and strength to the truss.
When constructing your roof trusses, you must first estimate the appropriate strength for the foundation of the roofing.
Because the bolts are too long, this might cause the structure to bow or collapse.
More Information Needed When Installing Roof Trusses
Truss installation is a multi-step process, requiring several different pieces of equipment and materials.
Some specialty tools might need to be purchased in order to complete the job properly.
This includes specific wrenches, power saws, drills and ratcheting screwdrivers. The following is an overview of the process involved in installing roof trusses.
- When you purchase your trusses, make sure to pick them up from the store on time; they are only available for certain periods of time before they go out-of-stock.
- Once you get home, inspect each truss carefully for damage, and note any missing parts.
- Before anything else, you have to measure your attic space in order to determine how many trusses you need.
- Once the appropriate number of trusses has been chosen, it is time to assemble them on a flat surface inside of your garage or another location where they will not be exposed to moisture or the elements.
- According to most experts, it is recommended that trusses are assembled on-site so they can be installed immediately.
- This method also makes it easier for you to strengthen the attachment points where the truss meets with other pieces of lumber, such as plywood or rafters.
- Once all of the trusses have been assembled and measured, the trusses should be moved to their permanent location using a lift or other device designed for this purpose.
- When you finally get to your roof, it is best if you have several friends helping you lift the trusses into place.
- It is also extremely important that they are put in exactly the right spot so that they are attached in a way that is not going to lead to leaks or other problems.
- Once the trusses are in place, additional parts such as plywood and rafters will need to be added at the proper locations so that your roof can support itself.
- If this involves cutting any of these pieces of lumber to size, you will need specific tools designed for this purpose.
After the roof is assembled, additional materials may be necessary to properly finish your roof, such as shingles or other coverings that are required to prevent leaks and drafts.
Once all of these materials have been purchased and installed on your roof, you can finally relax because your trusses are finished!

Tools You Will Need to Install Trusses
Here are some tools you need to get your roof trusses installed:
- Screw gun with 1-inch inch screws that are galvanized and corrosion resistant.
- Drill with 1/4 inch drill bits for pilot holes.
- Pry bar, hammer, wrenches, tape measure and safety goggles.
- Roofing nails or roofing staples (1 5/8 inches) for shingles.
- Pneumatic air nailer (5/8 inch).
- Roofing adhesive.
- Shop vacuum or leaf blower to clear debris after you are finished installing trusses.
Professional roofers might use expensive tools like cranes and lift equipment in order to get the job done, but these items are not necessary for the average homeowner to complete roof truss installation.
Once you have assembled your trusses, securely attach them in place on the rafters and secure plywood over top of them in order to support member loads and bear weight.
Place additional layers of wood over the joints in between each truss and continue until the entire roof is assembled.
Once all of the trusses are in place, you will need to add additional materials like shingles or other coverings designed to keep your home safe from water damage.
Hints and Tips in Installing Roof Trusses
Installing roof trusses for a garage roof isn’t difficult, especially if you use certain hints and suggestions.
Cut the timbers – If you are using wooden trusses, cut all the timbers to length before assembly.
Secure the timber panels – To ensure that the panels remain in place, use temporary nails.
Form a level platform – To keep the trusses at their correct height, create a level platform on which they can be placed while you erect them.
You don’t want to have one side dipping down or jutting up beyond another panel of wood.
Notch roof trusses – To make it easier to put the roof on, notch each truss at both ends. This way, they’ll fit better against one another when you’re nailing them into place.
Secure the ridge board – Your last step will be putting in a long piece of wood called a ridge board that runs along the apex of your roof.
Nail it into place and fill in the spaces between each truss with cross-bracing for strength, then install your roofing material of choice.
Add braces – Once your roof trusses are up, install ridge beam braces.
These will help to prevent the center of the building from sagging over time as a result of heavy snowfall or other weather conditions.
Inspecting Roof Trusses – It’s important that you inspect all of your roof truss assembly joints at least once each year and make sure that they are secure.
Add roofing – You can now finish off your structure with a layer of shingles or metal roofing, adding fascia boards and soffits as you go to make it look complete.
Your trusses should allow for plenty of ventilation to keep the building well-ventilated and dry at all times.
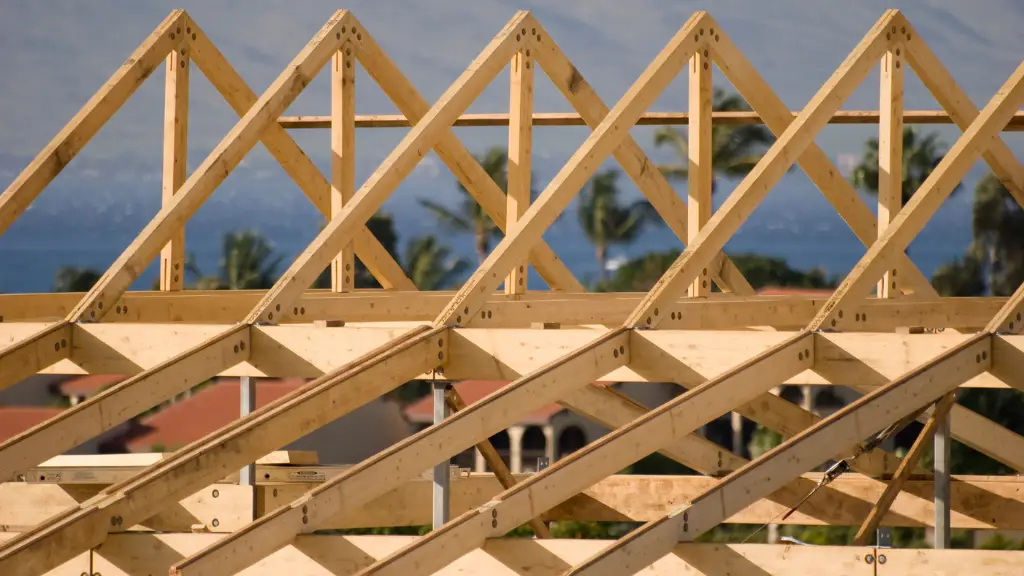
What are Roof Trusses?
Roof trusses are structural components used in the construction of roofs.
They are typically created out of engineered lumber or metal, but can also be fabricated from other materials like concrete and stone.
Roof trusses come in two varieties: “platform” and “built-up.” A platform roof truss is composed of pieces that lay flat, parallel to one another.
A built-up roof truss is composed of individual pieces that are laced together in a crisscrossing pattern.
Platform – Platform trusses are typically less expensive than built-up trusses. They also require fewer materials and labor hours to manufacture.
Built-Up – Built-up roof trusses are more complex to construct, but provide a sturdier structure that is resistant to wind damage and earthquakes.
Roof trusses are used in conjunction with rafters and plywood in order to support the weight of a roof’s surface, typically made out of concrete, asphalt shingles or wood.
The purpose of a roof truss is to provide a stable platform from which the rest of the roof can be built.
In order for this to happen, these individual pieces must be precisely engineered so that they are capable of supporting not only the weight of the ceiling but also any additional superimposed weight such as insulation, moisture and people.
While roof trusses are typically incredibly strong, they must also allow the roof to move slightly.
Advantages of Roof Trusses
Roof trusses provide a stable, level surface on which the rest of the roof can be built and avoid complicated framing with rafters and plywood alone.
Roof trusses can be adapted to meet different needs and specifications by cutting them into smaller pieces or adjusting the pattern of their design.
More of the advantages of having roof trusses are:
- They decrease the amount of time required to build a roof.
- They save on material costs.
- The materials used in their construction are eco-friendly, especially when made from recycled wood.
Disadvantages of Roof Trusses
Even with precise engineering, some roof trusses may be incapable of supporting a roof’s weight. If new support beams are added, this must be done in conjunction with the architectural design.
Each individual piece of a roof truss is susceptible to damage from water, rot and pests.
More of the disadvantages of having roof trusses include:
- They require more space on the ground during construction.
- The initial cost of a roof truss is typically higher than the cost of traditional rafters.
- They are difficult to transport, requiring specialized equipment.
- Their installation can be challenging for novice carpenters.
Roof Trusses Make It Easier to Build a Roof
While the initial cost of a roof truss is typically higher than that of traditional rafters, they can save on material costs as well as time.
A typical platform type roof truss is constructed from 2-by-4-inch pieces of lumber attached perpendicularly to one another by connector plates.
A built up roof truss will also use 2-by-4s, but they are connected at odd angles in order to make a series of triangles with the horizontal and vertical supports.
The most common materials used to construct roof trusses include:
- Wood (typically dimension lumber)
- Metal (structural steel)
Roof trusses made from engineered lumber are typically made out of plywood, oriented strand board or fiberboard.
What Makes Roof Trusses So Important?
One of the most important elements to consider when looking into home construction is that of your roof.
You will not want to overlook any part of your home’s construction, but with a roof having been up there from the beginning you’re already going to have a little bit more trouble getting it fixed if something goes wrong.
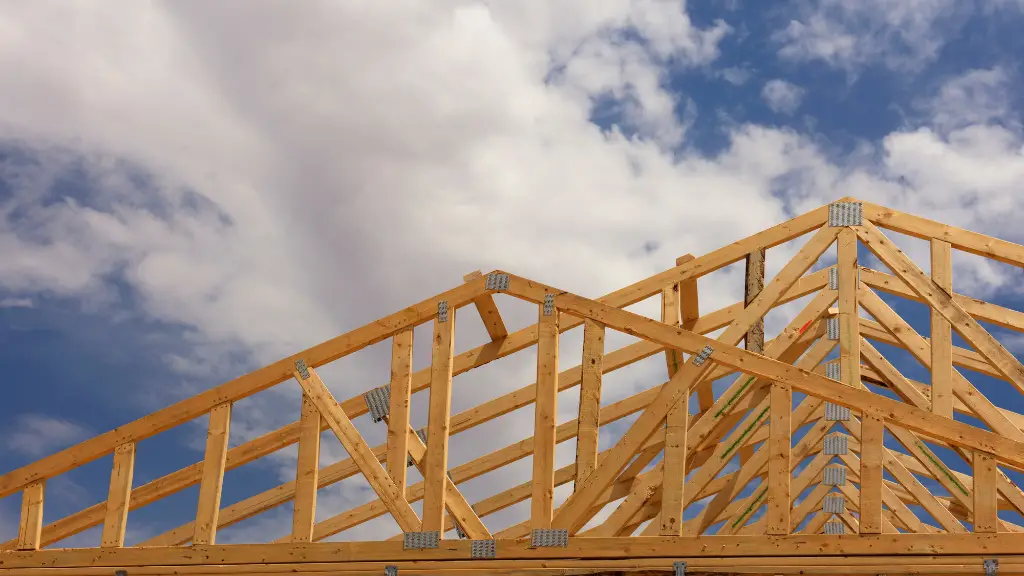
In their simplest terms, trusses are just a collection of triangular shapes that are used to help provide the roof with its stability and strength.
By using triangles, builders can create incredibly strong structures that can bear incredible weight while also maximizing space in places like your attic and garage.
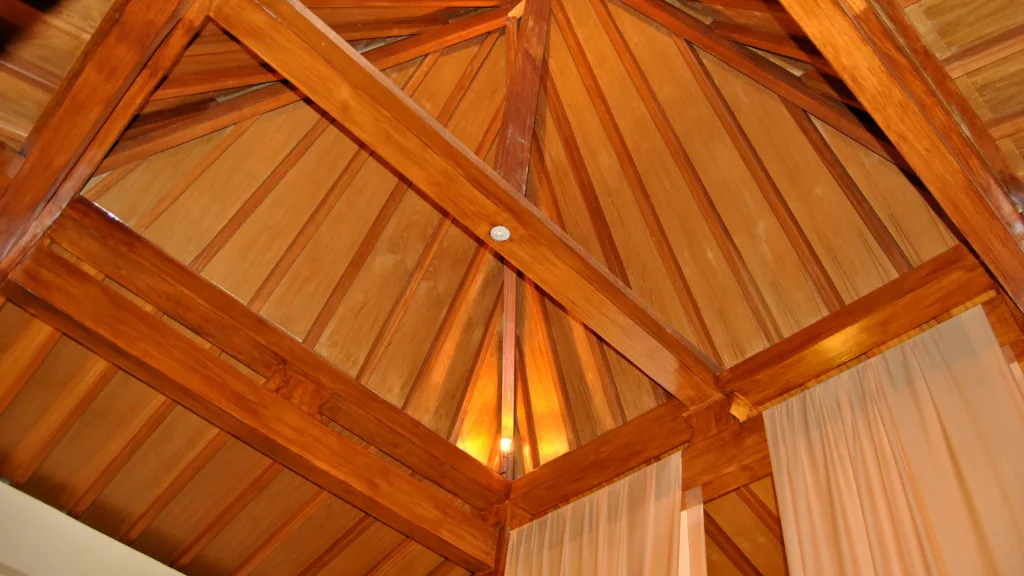
Trusses do more than just give us a strong and stable roof; they also serve to make roofs more durable as well as making them more aesthetically pleasing.
Using triangular shapes to build your roof will give you a very strong and attractive structure that is also incredibly practical for the job.
Do I Need to Hire a Professional to Install My Roof Trusses?
Roof trusses are pre-cut pieces of lumber that can be easily installed by a do-it-yourself homeowner.
If you have the right tools and experience with power tools, there is no reason why you can not install your own trusses.
The only additional costs to installing roof trusses will be for the roofing materials that are required to cover the trusses.
Conclusion
In conclusion, roof trusses are a great addition to any new or existing home. They provide strength and durability as well as ease of construction for the do-it-yourselfer.
The only initial costs associated with installing your own trusses will be that of hiring a professional installer to give you an estimate on their cost – after that you can install them on your own if you want to.